The following steps only apply if you are using the iGrafx Platform Datacenter Edition for on-premises installations. If you are a subscriber of our cloud solution, follow the Legacy SAML Setup Guide instead.
-
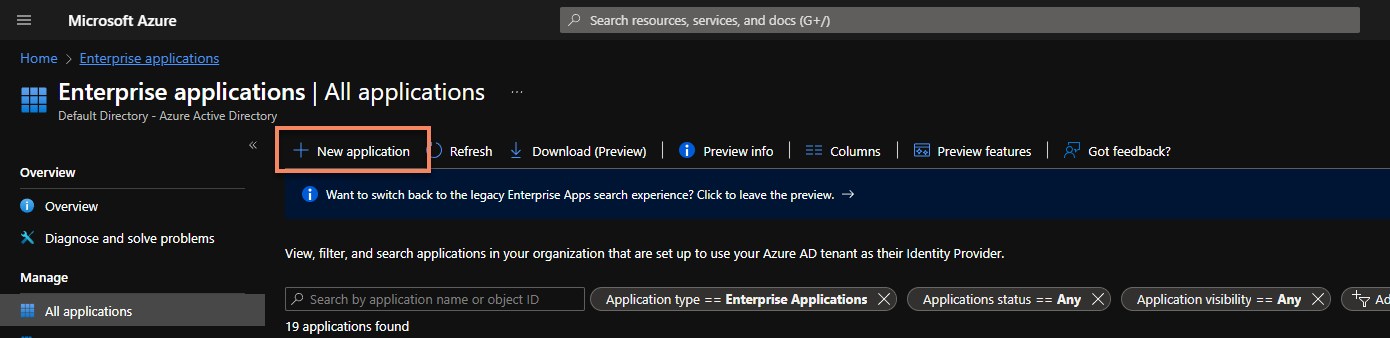
Navigate to „Enterprise Application“ under https://portal.azure.com
-
Click New application
-
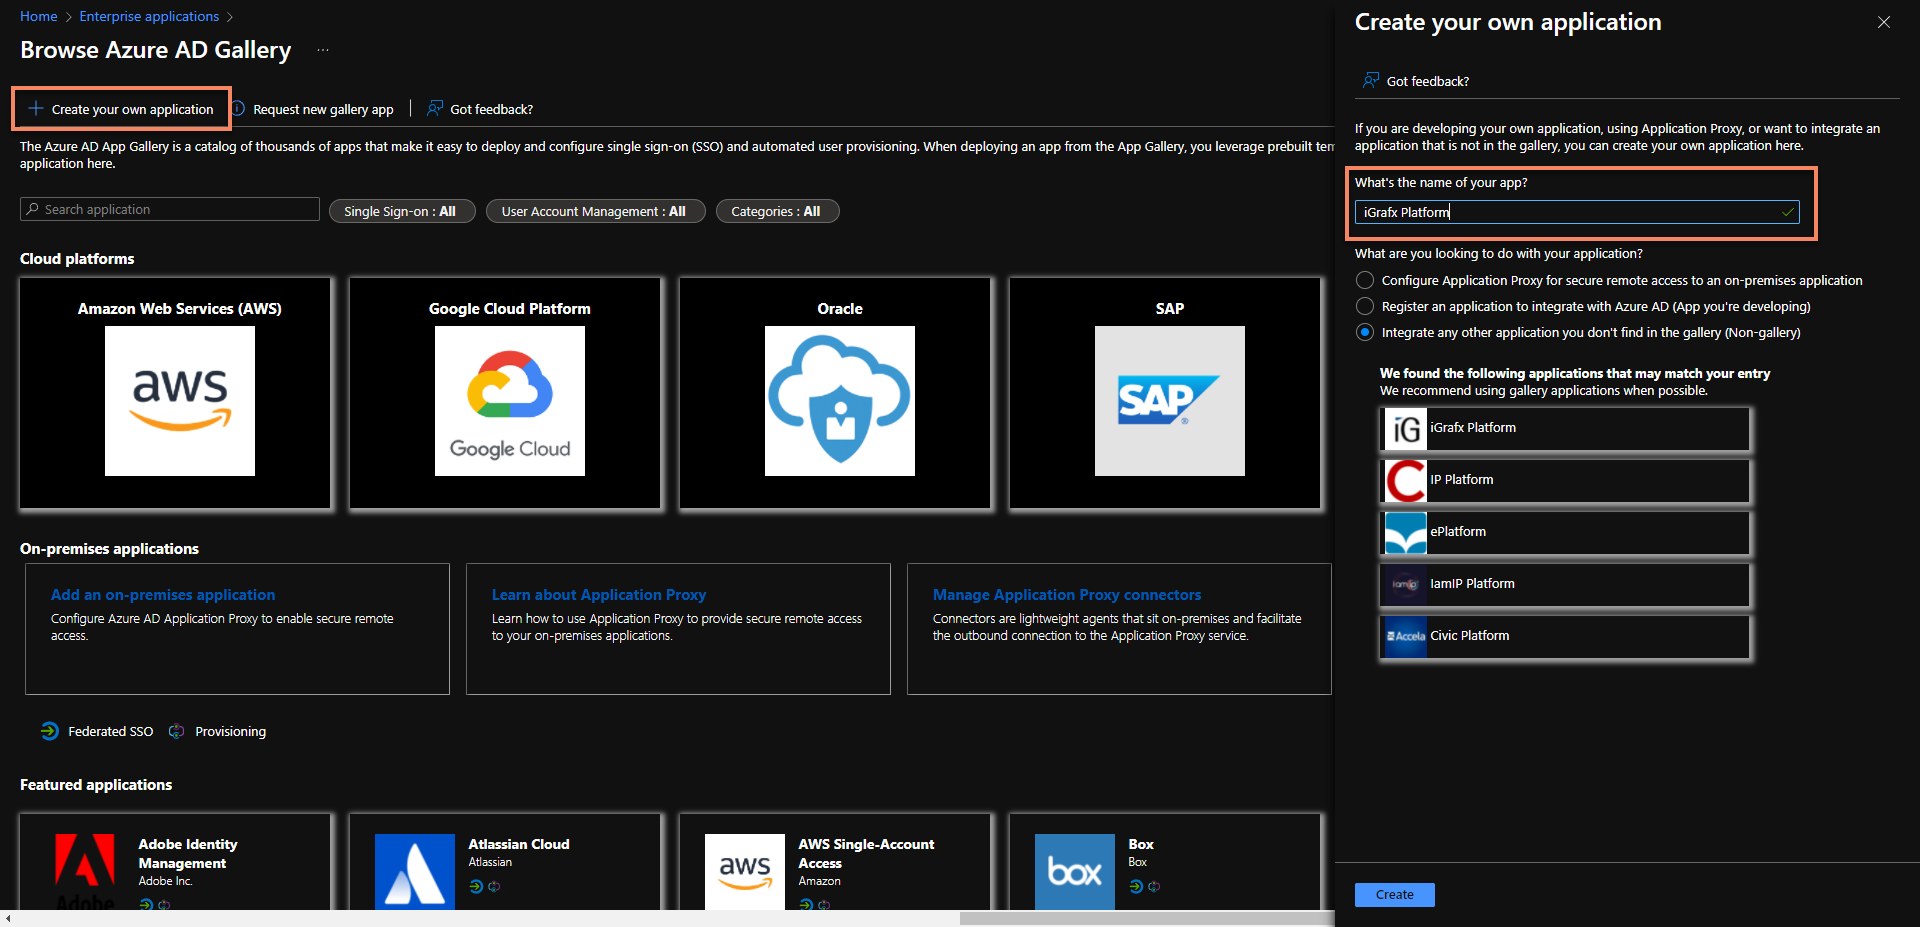
Click Create your own application and enter a name
-
Click Create
-
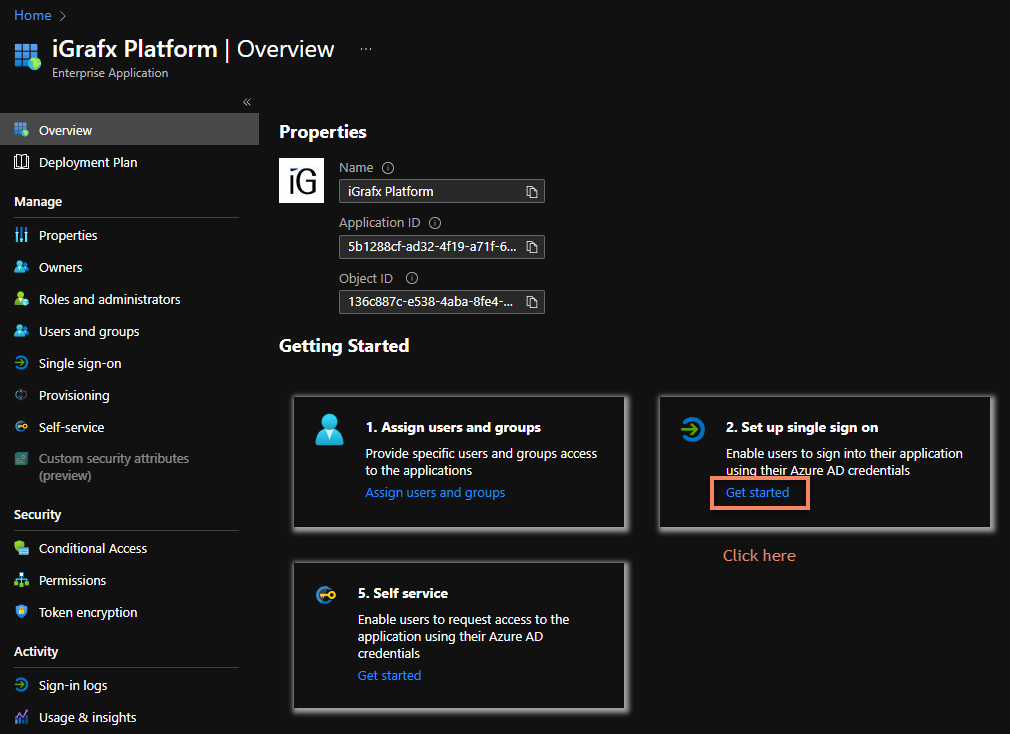
Click Get started
-
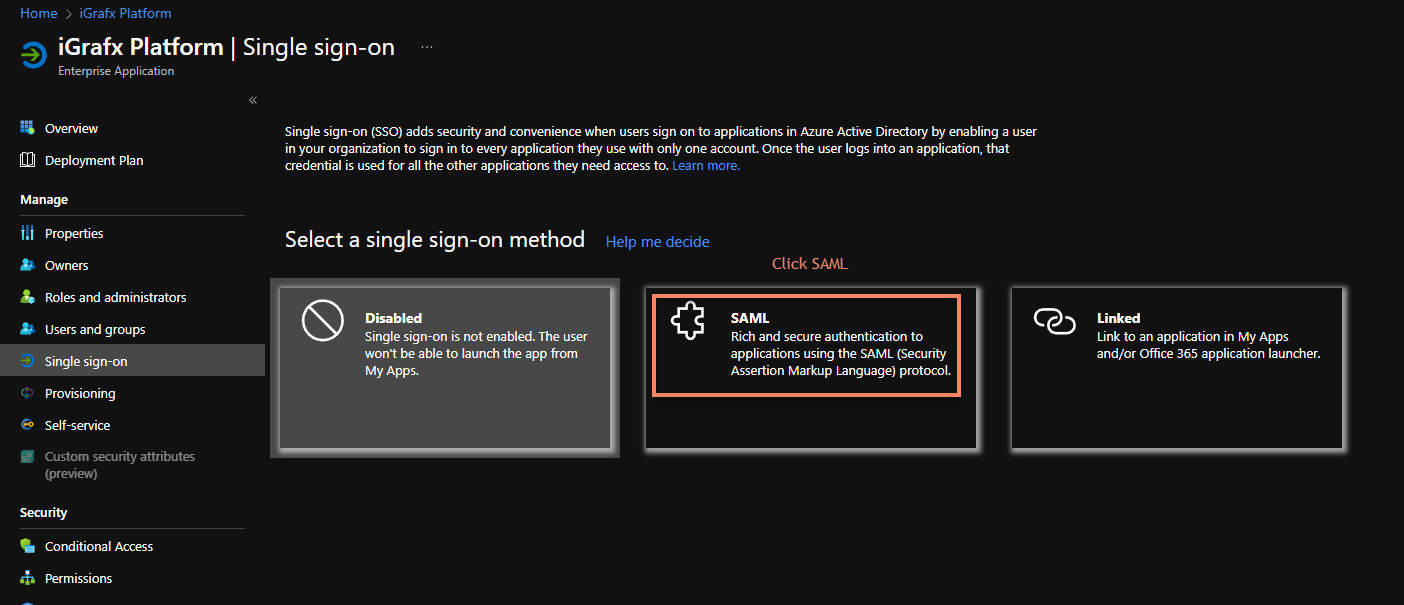
Click SAML
-
Click Edit

-
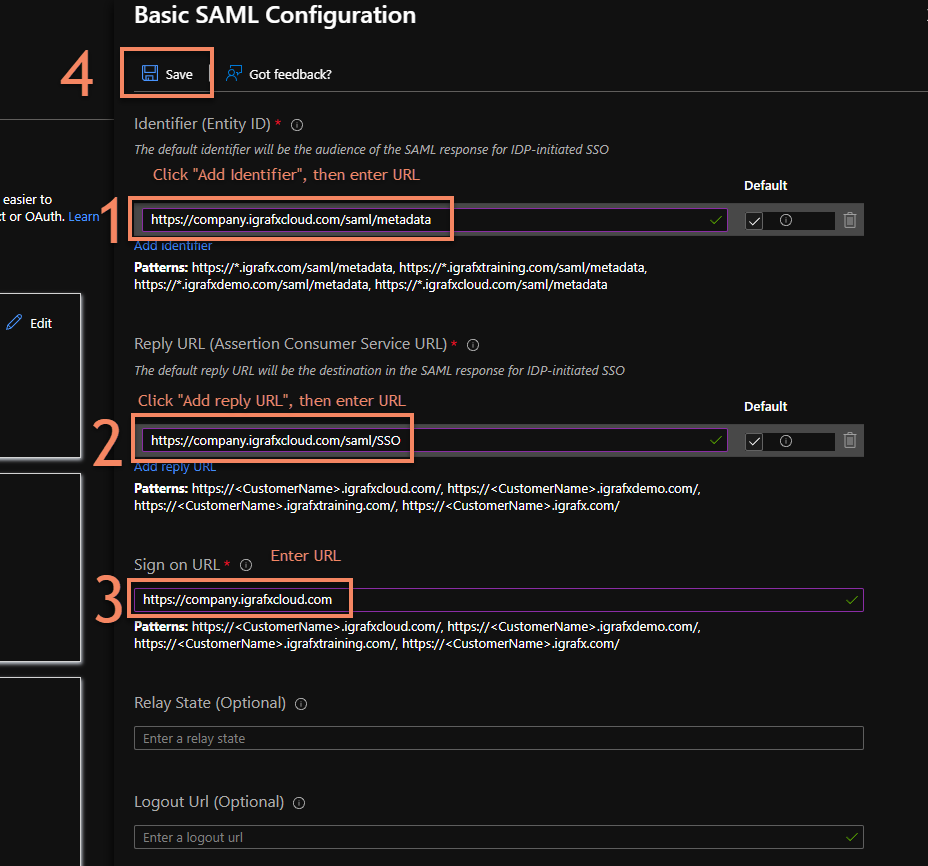
Click Add Identifier and enter your platform URL with /saml/medata at the end.
Add the Reply URL following the schema platform URL with /saml/SSO
Lastly add the Sign on URL
-
Click Save
-
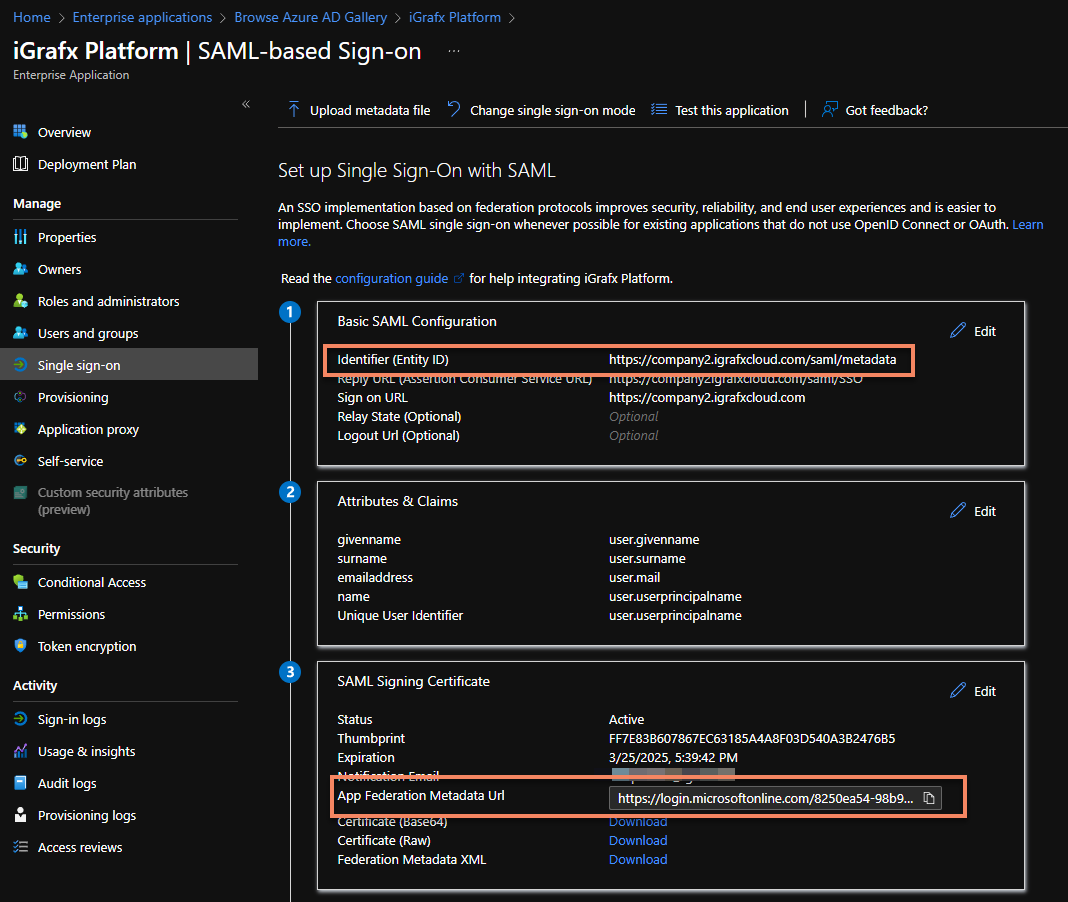
Copy the App Federation Metadata Url
-
In your System properties set
igrafx.usercentral.saml.metadataurl=YOUR_METADATA_URLor enter the URL in your browser to download the SAML metadata XML and upload it in your iGrafx platform (Administration → User management → SAML → Upload metadata file
Also set the system property for your entity ID, which you can see at the top of the same page
igrafx.usercentral.saml.entityId=YOUR_ENTITY_ID
and ensure the system property to turn on SAML is correct:
spring.profiles.active=samlsecurity
-
Ensure your
samlKeystore.jksis set up and the keystore access information is present in theigrafx.propertiesfile as described under Set up a SAML2 keystore under SAML Authentication (ADFS, Okta, Centrify, Azure AD) -
Restart your platform
-
Ensure your NameID (configurable in the
Attributes & Claimssection) is configured to match the login name of your users in the platform -
If any issues arise, follow the instructions to enable debugging described under SAML Authentication (ADFS, Okta, Centrify, Azure AD)