This document outlines the process of adding your Desktop Client documents to a repository. The Desktop Client is iGrafx® FlowCharter™, Process™, Process for Six Sigma™, Process for Enterprise Modeling™, and Process for SAP™. There’s also iGrafx® IDEF0™ and iGrafx® OrgCharter™
Opening (Connecting to) a Repository
You may have one or more repositories defined for use in the iGrafx® Platform. Your System Administrator will have enabled which repositories are available to you. To use a repository, you must first open it.
Before adding documents to the repository, you need to connect your Desktop Client to the repository. To do so:
|
Opening a Repository in the Desktop Client |
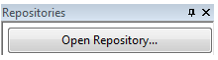
Alternatively, (or if the Open Repository dialog box doesn’t appear), from the Repositories menu, choose Open Repository.

|
Adding a Single Document to the Repository
To store a new iGrafx® document to a repository, you will first need to “Add” vs. “Check-In” the document, as checking in a document may only be performed on documents previously checked-out. Conversely, if you wish to “add” a new version of an iGrafx® document already in a repository, you should first check out the document, make the change, and then check the document back in.
To add a new iGrafx® document to a repository and classify it with further information:
-
If the iGrafx® file in question is already open and visible in the Desktop client, go to step 2. Otherwise, open the iGrafx® (igx) document in question via the File à Open menu option. Then, navigate to the folder where you stored the file, and click the Open button.
-
Right-click your mouse button on the Repository folder where you want to add the file, and select the “Add filename” option from the context menu, where filename is the name of the file you opened in step 1.
Alternatively, select the folder where you want to add the file, and then from the Repositories menu, choose Add to Repository, and then choose Add “filename”.
-
In the Add Document dialog box, enter any applicable Comments and populate any required Custom Properties. Your dialog box should now look like the following:
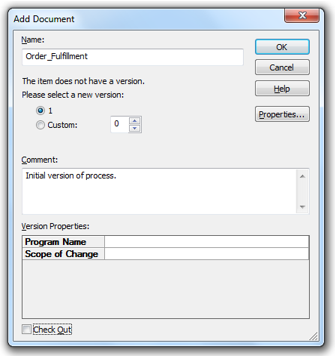
Note: If you do not name your iGrafx® files to match the name you want in the repository, you have an opportunity to change the name of the document at this point. You may also rename files at a later time.
Note: If your diagram links to documents outside of the repository (e.g., on a share drive), then you may want to also add those files to the repository, and update the links in the diagram to the repository documents. This will ensure that important related data is still accessible to viewers of the diagram.
Document Custom Properties
Your repository Administrator may define custom properties that need to be populated at the document level. The screenshot above suggests that an Administrator has defined 2 custom properties to be available for all documents; namely, Program Name and Scope of Change. At the time a custom property is defined, the Administrator can choose whether this property can remain empty or not (upon adding or checking in the document) or whether the value is remembered from the last version of a checked in document.
Adding Multiple Documents to the Repository
If there are many iGrafx documents (IGX files) in the same folder structure, you may add all of them (and any linked/related documents) using the ‘Add Multiple’ command.
To add multiple items to the repository:
-
Select the repository, or folder in the repository, that you wish to add multiple items to. You may do so by clicking your left mouse button in the Repositories Explorer window.
-
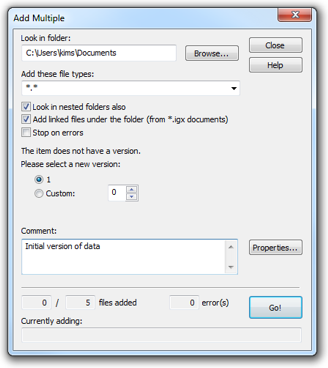
From the Repositories menu, choose Add to Repository and then Add Multiple... This displays the Add Multiple dialog box.
-
Browse to the folder you wish to add files for (for example, the folder containing training files).
-
Select which type of files you wish to add to the repository in the “Add these file types:” drop-down. Choosing “*.*” will allow any file type to be added; the default is iGrafx® (“*.igx”) files.
-
Type in a comment about these files; the comment will be applied to each file.
-
(Optional): Decide whether you want to look in all folders contained within the folder you browsed to.
-
(Optional): Add any files linked to by iGrafx® documents that are in the same folder, or some sub-folder, of the folder you browsed to. This will help ensure that any files on a network share drive or other computer are also stored in the repository.
-
(Optional): If errors are encountered during the add operation, the command may automatically stop.
Your dialog box may now look like the following:
-
Click the “Go!” button, to add all the files (of the type you specified), and optionally folders, within the folder you browsed to.
Related articles
Related articles appear here based on the labels you select. Click to edit the macro and add or change labels.
|
Related issues
|