This tutorial describes how to enable automatic user provisioning and de-provisioning with Azure AD/Microsoft Entra ID. Automatic user provisioning via the SCIM protocol is only available in the iGrafx cloud offering with the Process Design module.
For more information on how this technology works see this Azure document.
Prerequisites
The following items are required:
-
An Azure Active Directory/Microsoft Entra ID
-
Admin access to iGrafx Process Design module to create the SCIM directory
Create your SCIM directory in iGrafx Process Design
The Admin user performing these steps requires Manage user directories server permission:
-
Log into iGrafx Process360 Live Process Design
-
Go to Administration → User Management → Directories
-
Click Add new directory
-
Enter a name for the directory
-
Select directory type: SCIM
-
Click Create directory
-
Write down your SCIM secret token and SCIM Tenant URL for later use
Note: To view your SCIM Tenant URL or generate a new token, click edit on the SCIM directory and then generate new token
Configure Azure AD/Microsoft Entra ID for user account provisioning:
-
In the Azure portal, browse to the Azure Active Directory → Enterprise Apps → All applications section.
-
If you have a SAML/SSO Enterprise app navigate to it, continue with step 4
or Click New Application at the top of the page. -
Click Create your own application → Enter a name in Input Name field → Select "Integrate any other application you don't find in the gallery"
-
Now click Provisioning Tab (You may have to click Get Started button to see the next step.)
-
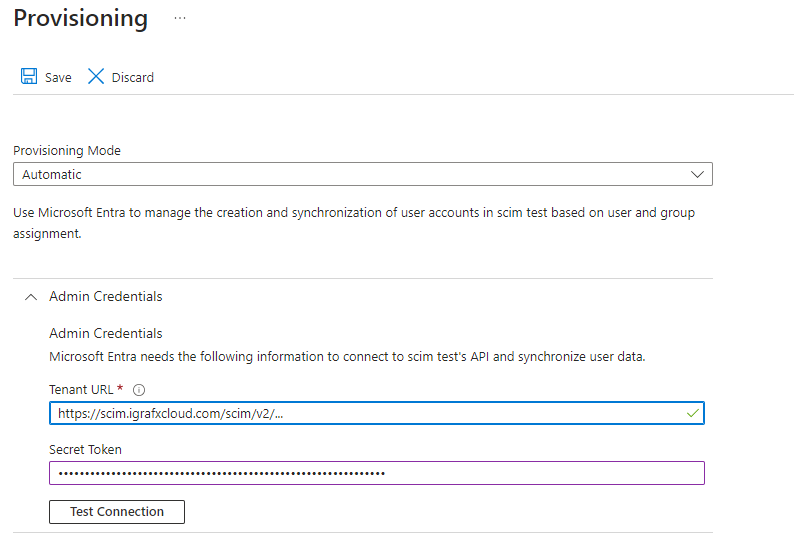
Set the provisioning mode to Automatic
-
Enter the SCIM Tenant URL and Secret Token (see instructions here)
-
Click Test Connection to see if your connection was successful (
Not successful? Contact our support for further assistance)
-
Under Settings → Enter an email to receive any synchronization issues
-
Click Save
-
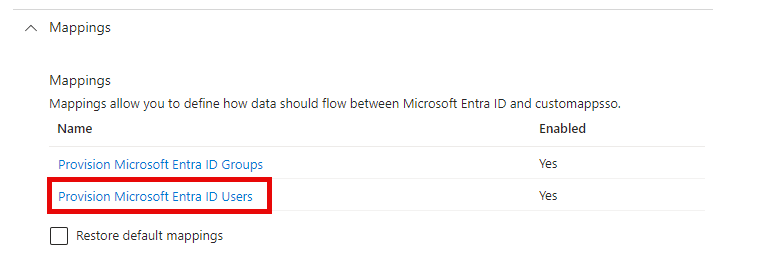
Open the Mappings accordion that appears after saving
Configuring Mappings
Enable User Mapping
Now open the mappings dropdown located under the "Admin Credentials" section
-
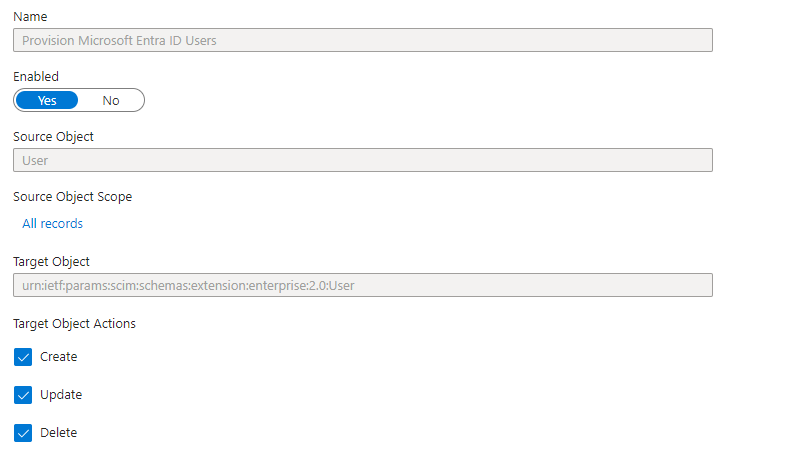
Enable Provisioning of Users
-
Select Create, Update, and Delete under target object actions
-
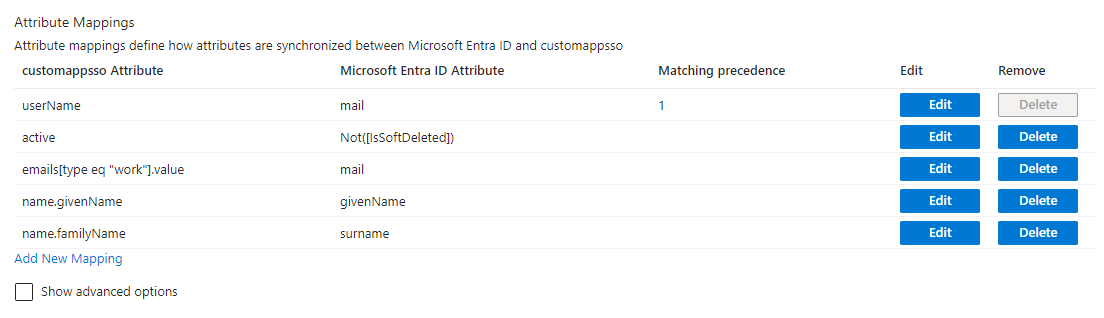
By default, Microsoft Entra ID defines a large number of mappings. iGrafx only needs the following 5 attributes mapped which are listed below.
We suggest changing the defaults to the below, in particular the username must be adjusted to be a valid email address. The mail attribute is commonly available for this.
|
iGrafx User Attribute |
Attribute Mapping Values |
||
|---|---|---|---|
|
Mapping Type |
Source Attribute/Expression |
Target Attribute |
|
|
Username |
Direct |
|
userName |
|
Enabled |
Expression |
Not([IsSoftDeleted]) |
active |
|
|
Direct |
|
emails[type eq "work"].value |
|
First name |
Direct |
givenName |
name.givenName |
|
Last name |
Direct |
surname |
name.familyName |
You can delete all other extra Attribute Mappings. The remaining ones should look like this:
-
Click Save at the top
Enable Group Mapping
-
Enable Provisioning of Groups
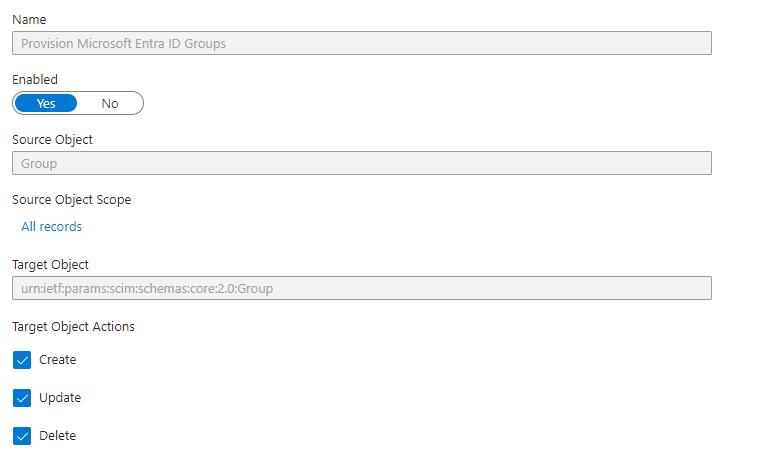
-
Select Create, Update, and Delete under the Target object actions
-
Change the Group Attribute mappings as follows
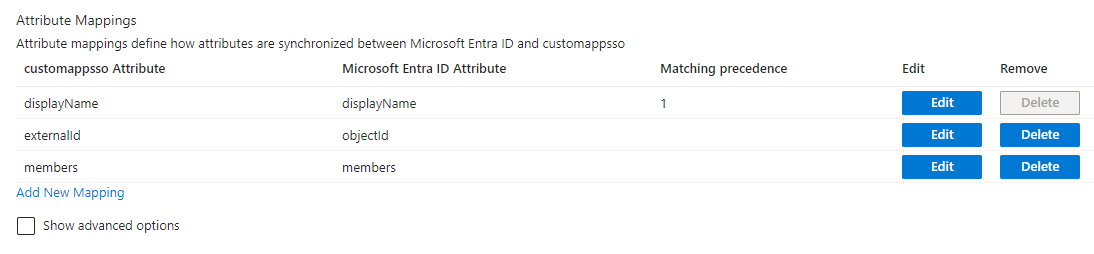
If objectId or members is missing in your mappings, click Add New Mapping and configure them as shown below
|
Mapping Type |
Source Attribute/Expression |
Target Attribute |
|---|---|---|
|
Direct |
members |
members |
|
Direct |
objectId |
externalId |
-
Click Save
-
Once both user and group mappings are configured, press Save at the top of the main window.
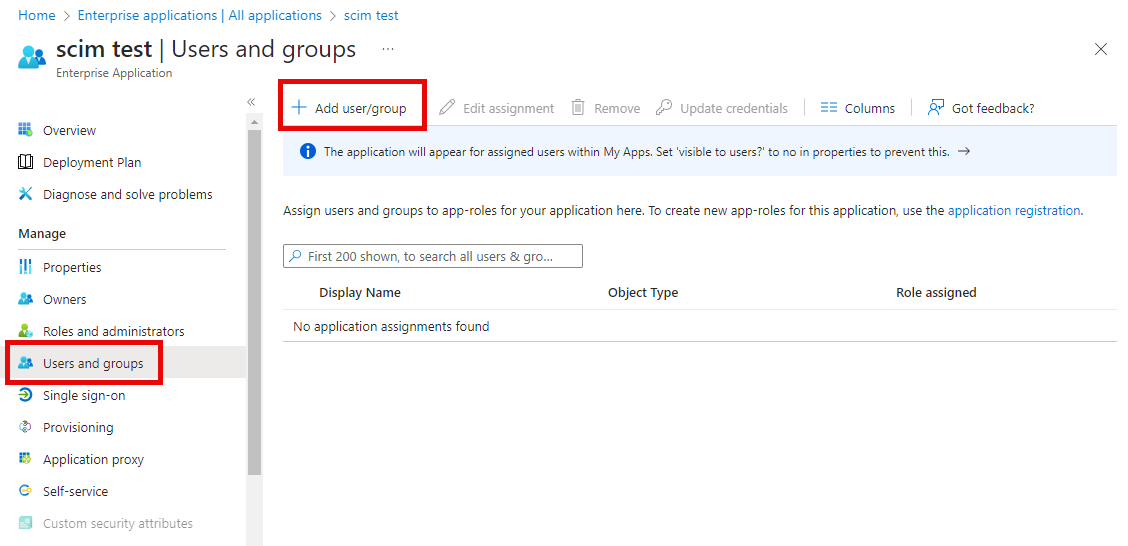
Configure Users and Groups to provision
To select which users and groups are synchronized, go to the Users and Groups blade on your Enterprise application, and choose the users and groups you would like to have provisioned:
Once you have selected the users and groups you would like to provision, the synchronization should run every 40 minutes and create your users and groups as configured.
For more information on how to read the Azure AD/Microsoft Entra ID provisioning logs, see Reporting on automatic user account provisioning.
Additional resources