Manage your profile and settings
My Profile holds the settings that shape how the platform looks for you — time zone, date format, languages — plus your roles, licenses, cycle groups, watched items, check-outs, and the Early Access features you can preview.
Prerequisites
None — every signed-in user has a profile.
Steps
Open your profile
Open the user menu: select your avatar in the upper right, tooltip Account settings. Then select My Profile. The header shows your name, your licenses, and your login name, email address, and user directory. Settings save as you change them.
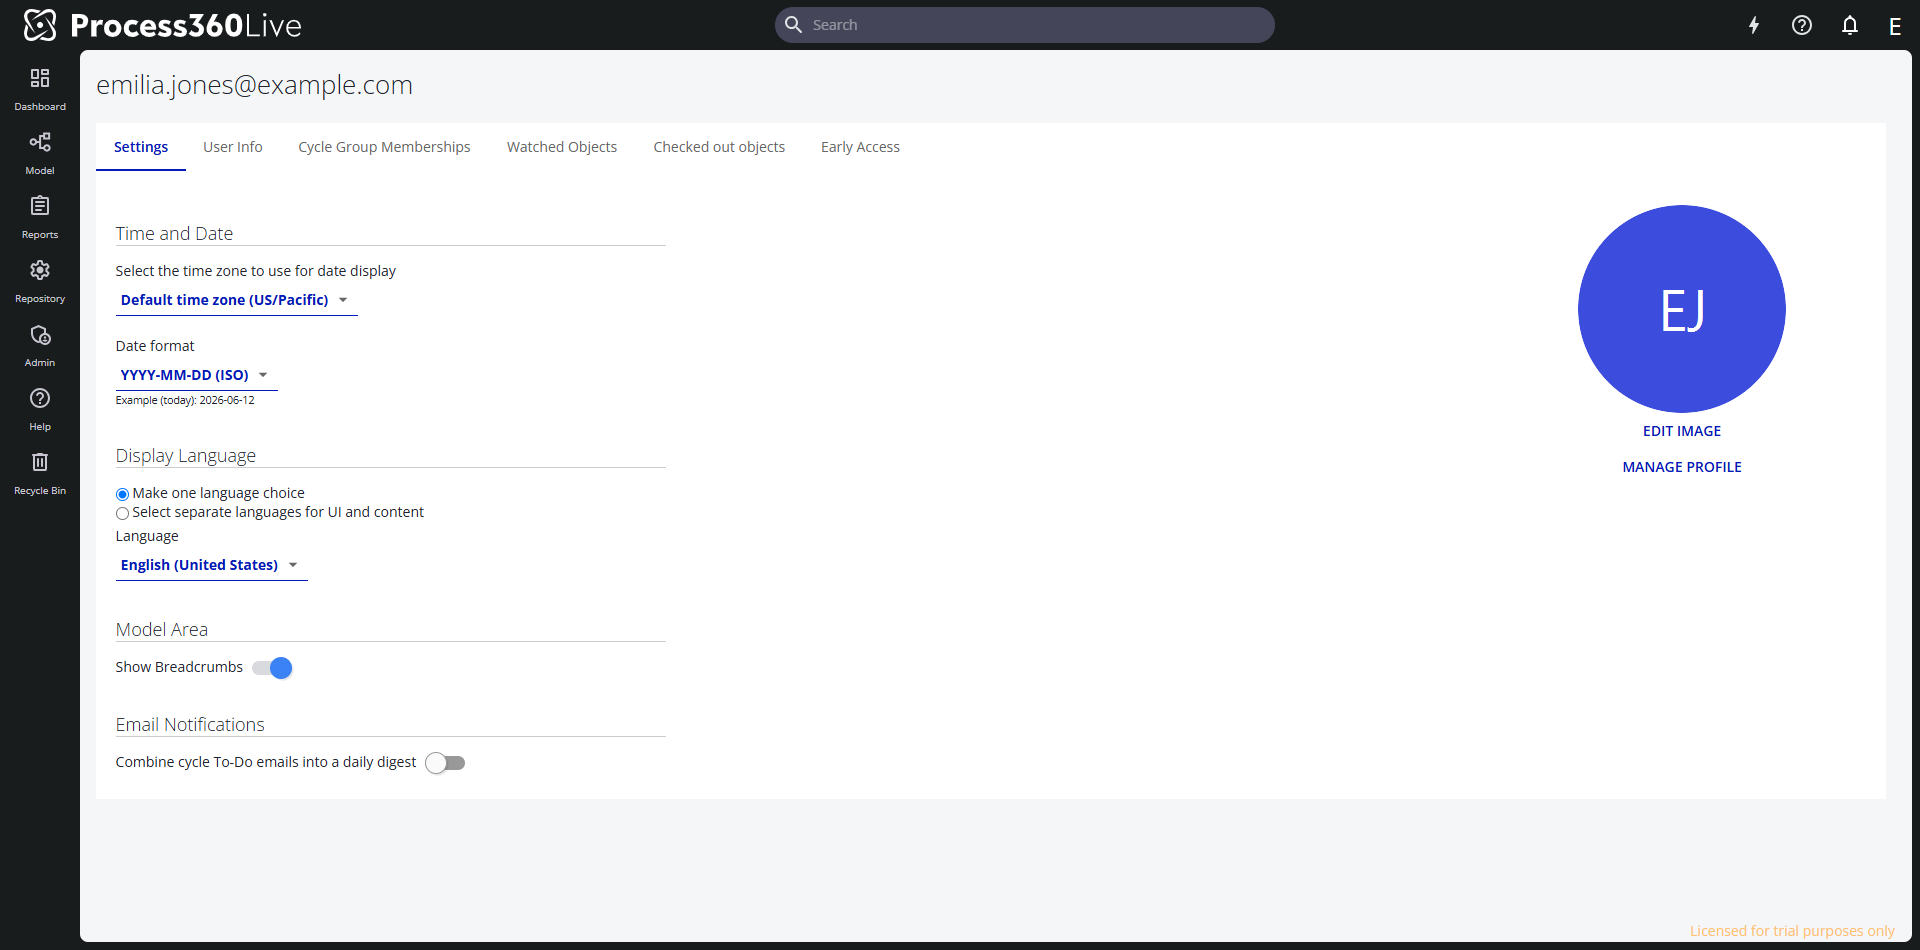
Adjust your settings
On the Settings tab:
- Time and Date — pick the time zone used to display dates, and a Date format:
YYYY-MM-DD(ISO),DD.MM.YYYY(Euro), orMM/DD/YYYY(US). An example below the field shows today's date in the chosen format. - Display Language — keep Make one language choice to use one language everywhere, or choose Select separate languages for UI and content to read menus in one language (UI and Notifications Language) and repository content in another (Content Language). Content appears in the content language only where the repository stores a translation.
- Model Area — Show Breadcrumbs turns the breadcrumb above each repository item on or off. When an administrator turns on change icons, Show change icons in repository tree appears here too. Under Display Changes On, choose All Objects or Watched Objects Only.
- Email Notifications — Combine cycle To-Do emails into a daily digest replaces individual cycle emails with one summary per day. Your repository's configuration sets the default.
Change how you sign in
What you see depends on your platform and your account:
- Accounts with an iGrafx password get a Change password section at the bottom of the Settings tab. The Change password button in the profile header jumps to it.
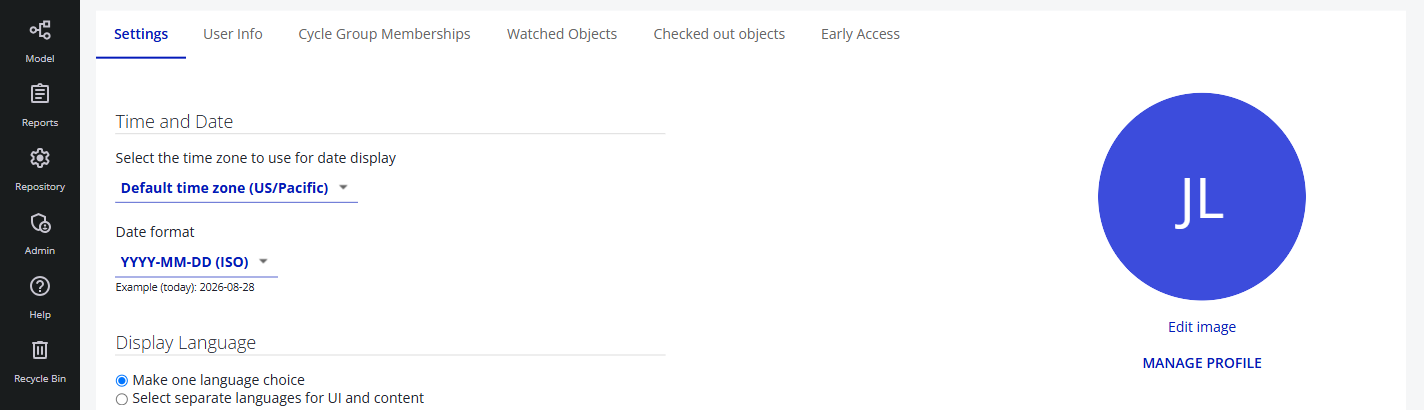
- A Manage Profile button appears in the profile header when your platform is on the iGrafx IdentityiGrafx Identity The iGrafx identity and access management service that brokers authentication between customer identity providers and Process360 Live components. Solution, whether or not your organization uses its own identity provider. It opens, in a new tab, the Identity Solution for the region your platform is deployed in — the account and password there are shared across iGrafx in that region, not only this platform. A platform on the classic iGrafx login has no such button.
To set your profile picture, select your avatar in the profile header — it carries a camera icon, tooltip Change profile image — then Edit image. Remove image deletes the current picture.
Set up multi-factor authentication
A second factor means your password alone isn't enough to reach your account. You can register an authenticator app that generates time-based one-time passwords (TOTP), a passkey held on a device or password manager, or both.
This uses the Manage Profile button described above, which opens the account console. A platform on the classic iGrafx login has no console, so there's nowhere to register a second factor.
-
Click Manage Profile, at the right of the profile header.
-
In the left menu, select Account Security, then Signing In.

Both methods live in Two-Factor Authentication on that page. Each one reads is not set up until you register it, and each has its own set-up link on the right.
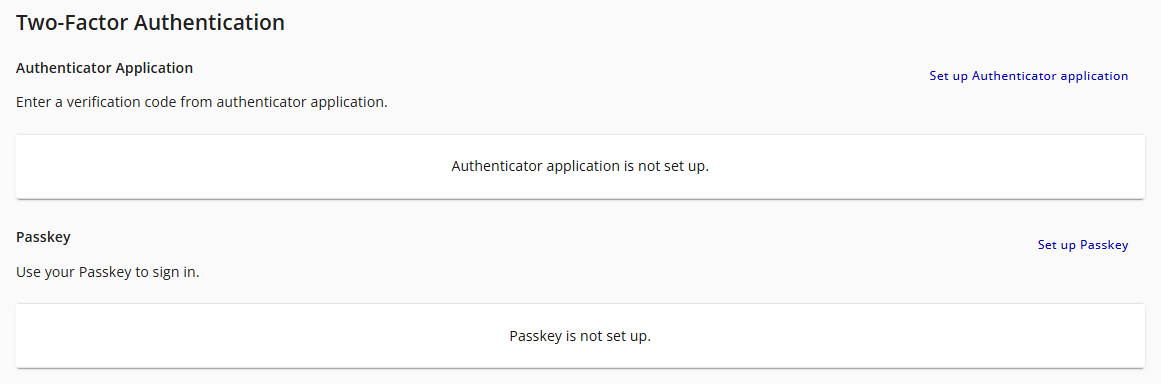
For an authenticator app:
- Click Set up Authenticator application.
- Scan the QR code with your authenticator app.
- Enter the code your app generates to confirm it, and name the app so you can recognize it later.
For a passkey:
- Click Set up Passkey.
- Confirm your browser's prompt with your device's screen lock, fingerprint, or face recognition.
- Name the passkey after the device that holds it.
Sign out and back in to confirm. After the password, the sign-in asks for a code from your authenticator app, or for the passkey.
If you register more than one method, the sign-in prompts for one of them and offers Try Another Way, which lists the rest so you can pick another.
To replace a method, register the new one and confirm it works — using Try Another Way if the sign-in prompts for the old one — then delete the old entry on Signing In. If you've lost the only second factor on your account, contact Customer Support, because nobody can read a registered factor back to you.
Review the other tabs
- User Info — your Server Roles and Repository Roles (with the group each one is inherited from), your License Assignment, and Linked Resources: the resources an administrator has mapped to you, which feed your assignments.
- Cycle Group Memberships — the cycle groups you belong to, and the items where you take part in a cycle directly.
- Watched Objects — everything you watch. Unwatch removes an elective watch, and Watch restores it; items marked Required to Watch can't be unwatched. Stop watching all clears your elective watches in every repository at once, and you can't undo it.
- Checked Out Objects — the items currently checked out to you, with the repository and check-out time.
- Early Access — preview features you can turn on for yourself before their full release, each with a short description and a Leave Feedback link.
The Cycle Group Memberships, Watched Objects, and Checked Out Objects tabs each have a search box and a repository filter.
Related
- Working in multiple languages — how UI, content, and repository languages fit together
- View your assignments — the work mapped to your linked resource
- Watch an item — how watching works
- Multi-factor authentication — which accounts can register a second factor, and how it differs under single sign-on