For Azure AD (Microsoft Entra)
-
Go to https://portal.azure.com
-
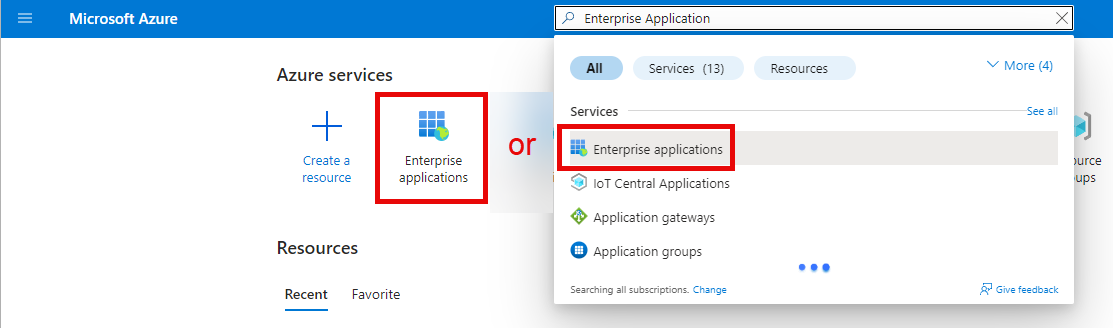
Search and select Enterprise Application
-
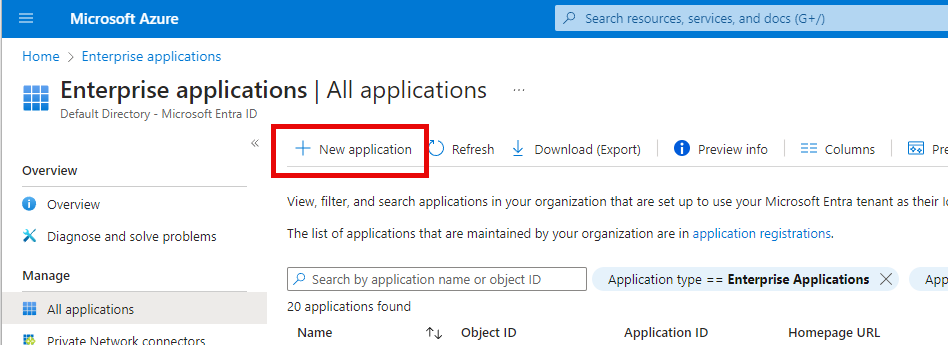
Click New application
-
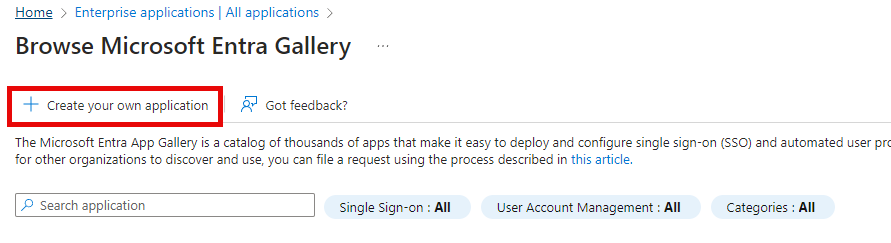
On the Browser Microsoft Entra Gallery page, click Create your own application
-
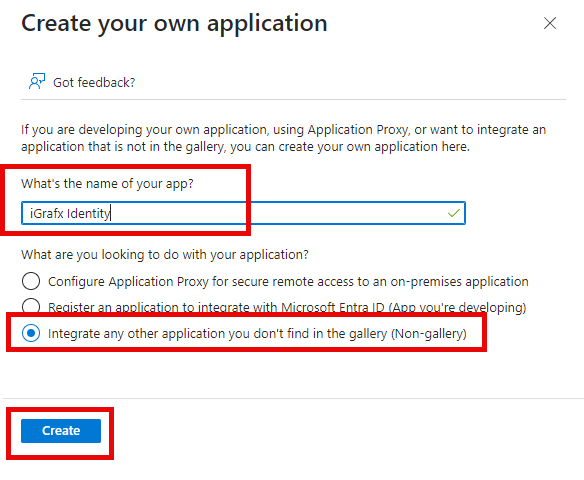
Enter a name you want to identify the application with
-
Select Integrate any other application you don't find in the gallery (Non-gallery)
-
Click Create
-
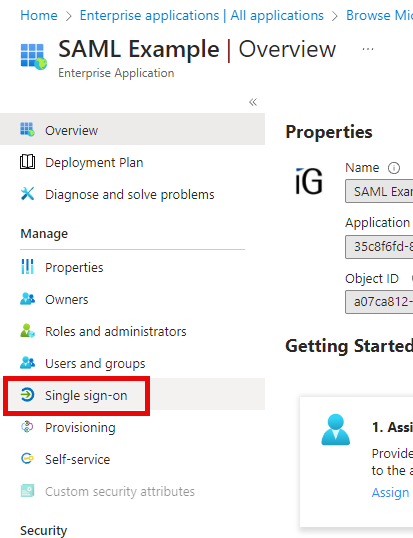
In your newly created Enterprise Application, click the Single sign-on blade to open it.
-
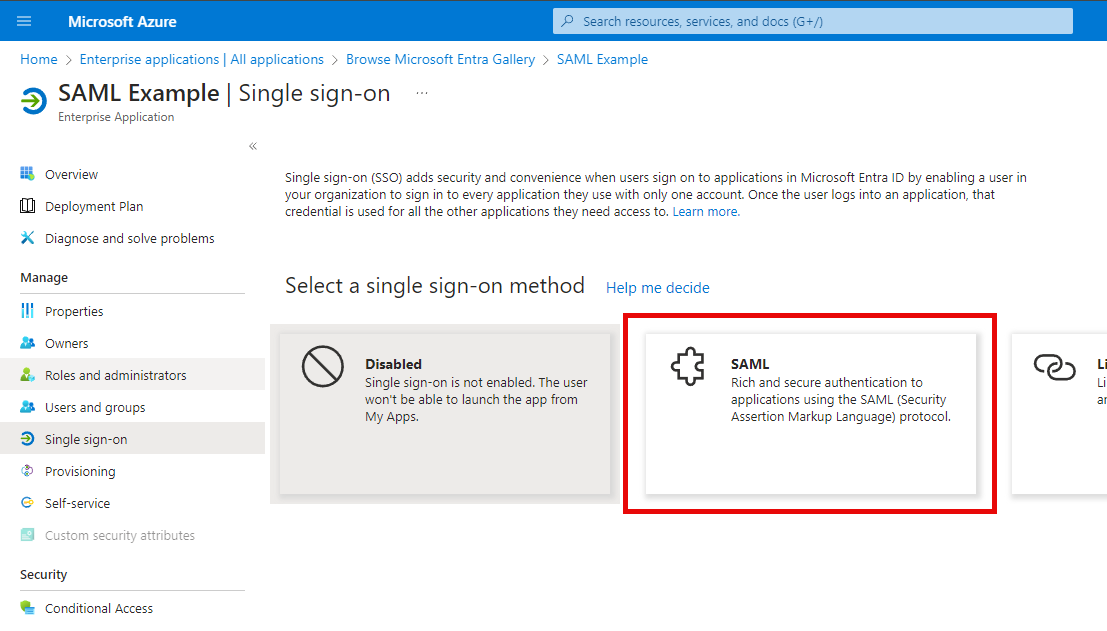
On the single sign-on blade, select SAML
-
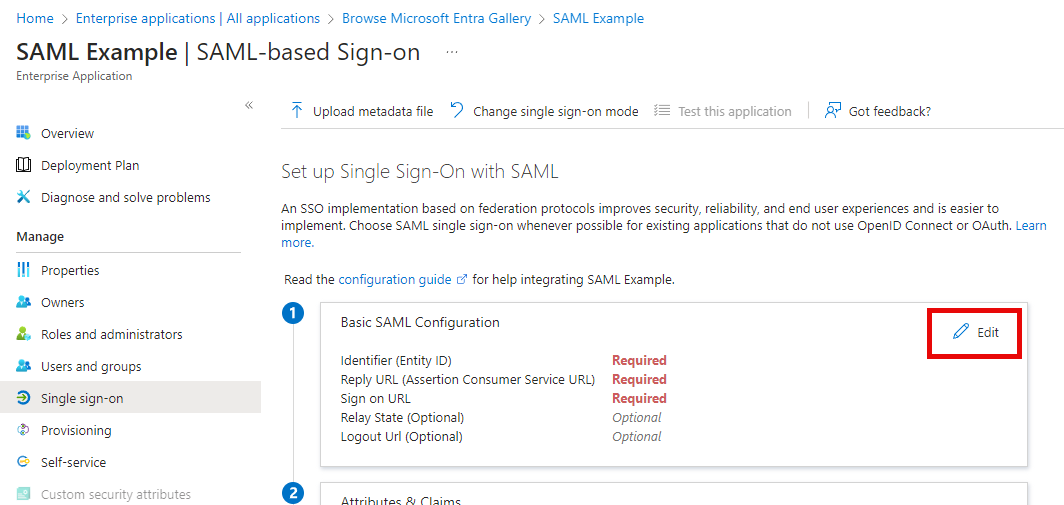
Click Edit to configure your SAML
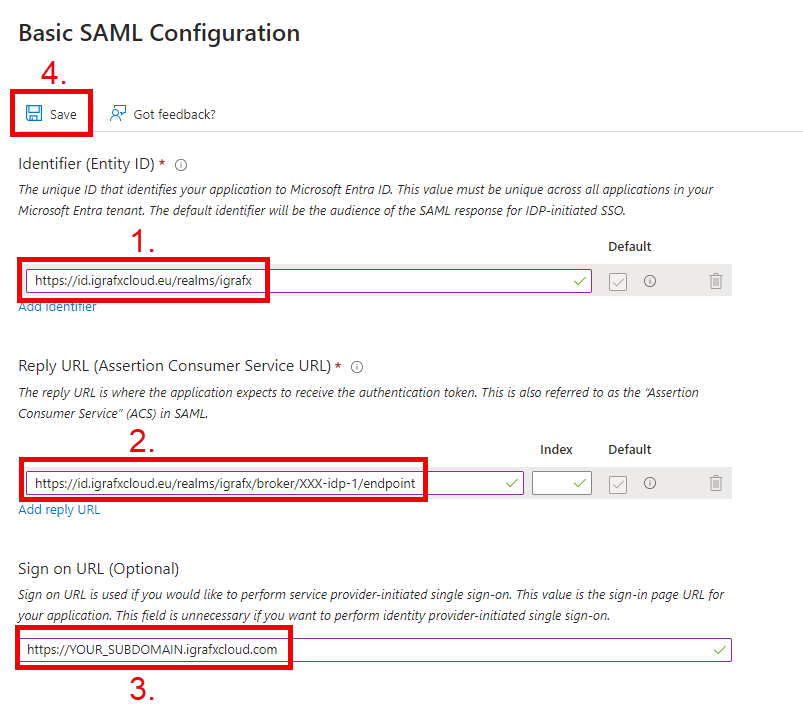
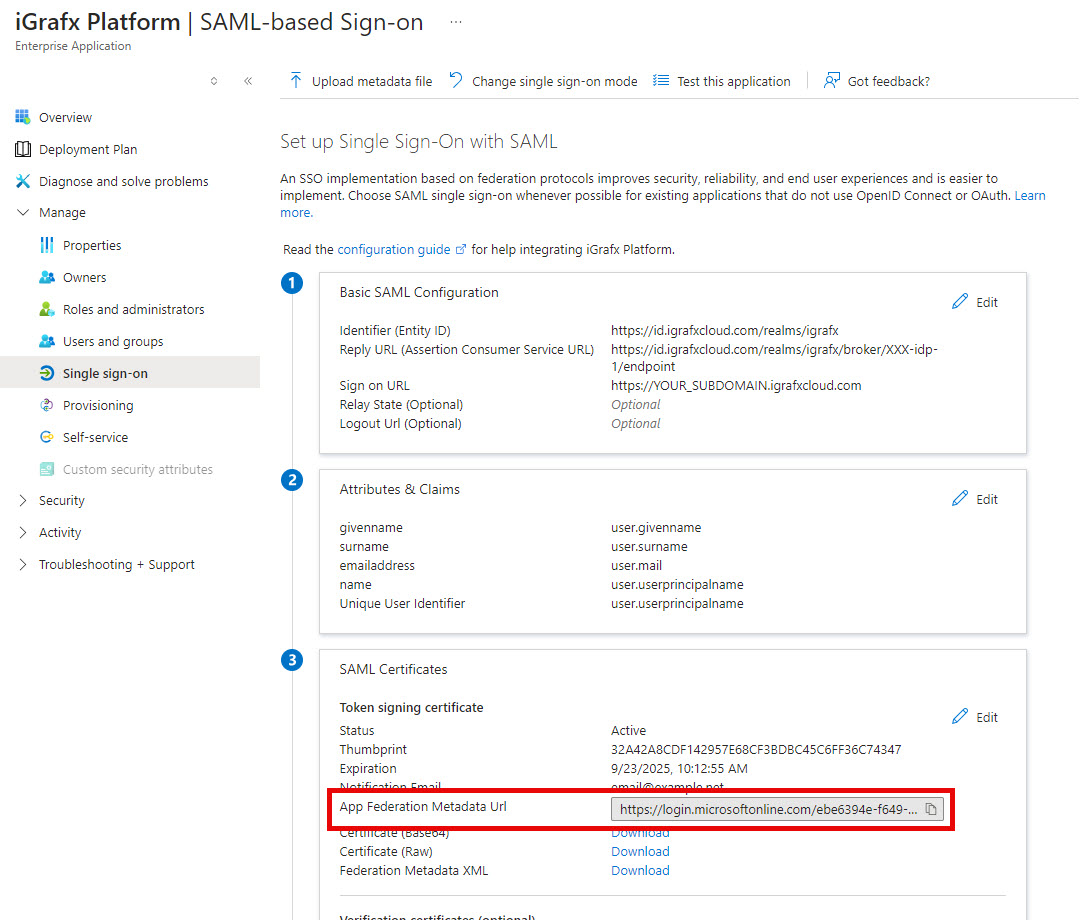
Basic SAML Configuration by region
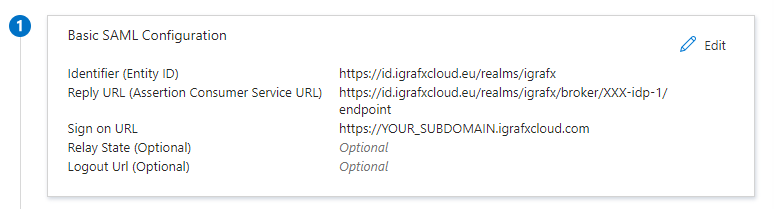
For Europe/EMEA
-
Identifier (Entity ID of the Service Provider):
https://id.igrafxcloud.eu/realms/igrafx -
The specific Reply URL for your iGrafx Process360 Live will be provided to you by iGrafx
ACS/Reply URL:https://id.igrafxcloud.eu/realms/igrafx/broker/YourTenant-idp-1/endpoint -
Sign on URL:
https://YOUR_SUBDOMAIN.igrafxcloud.com
Rest of the World/NA
-
Identifier (Entity ID of the Service Provider):
https://id.igrafxcloud.com/realms/igrafx -
The specific Reply URL for your iGrafx Process360 Live will be provided to you by iGrafx
ACS/Reply URL:https://id.igrafxcloud.com/realms/igrafx/broker/YourTenant-idp-1/endpoint -
Sign on URL:
https://YOUR_SUBDOMAIN.igrafxcloud.com
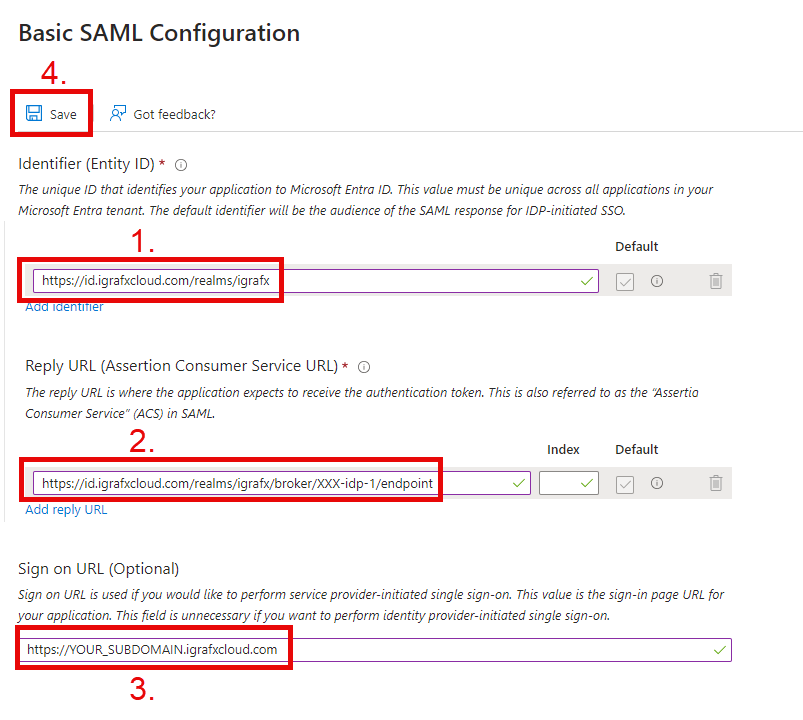
-
Click SAVE and the end result should look like this:
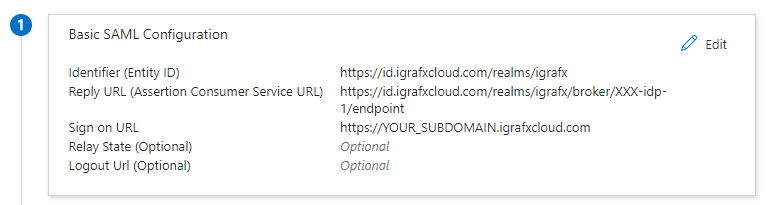
-
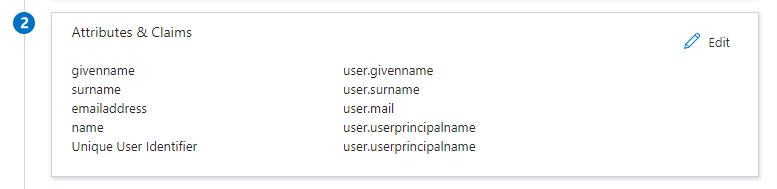
Commonly, your Attributes & Claims section is configured correctly and can be left unchanged.
-
You can then get the SAML metadata URL that you will need to provide to iGrafx by clicking the copy button in the section below
-
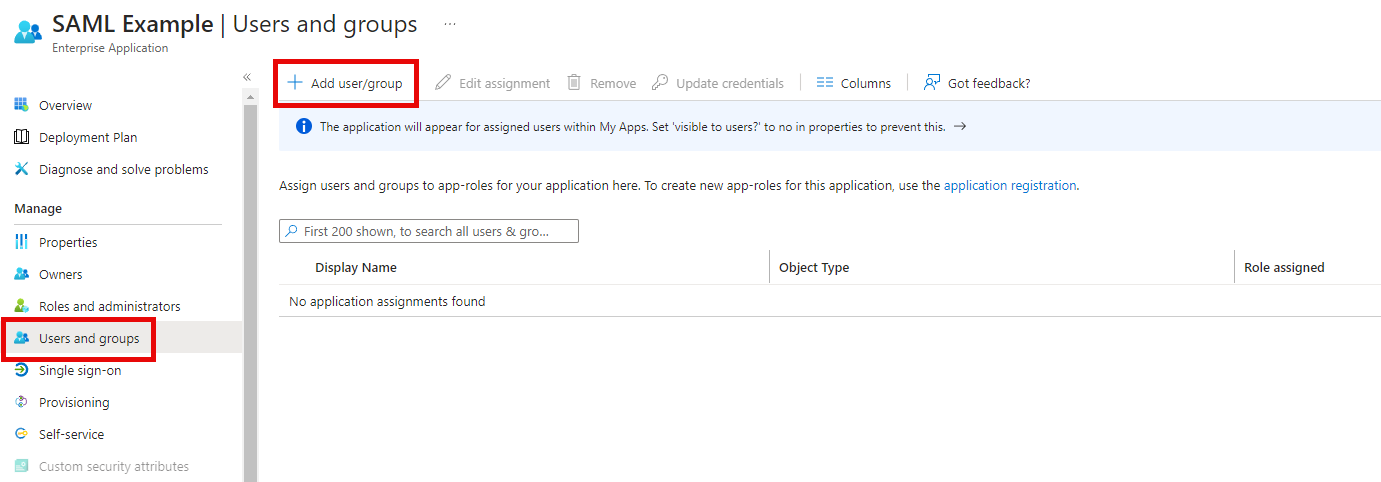
Finally, configure your groups and users that are allowed to use SSO with the created Enterprise application
-
After sending the metadata URL to iGrafx, the iGrafx team will configure the iGrafx Identity Solution and will let you know when it’s ready to be tested.