Display Fields
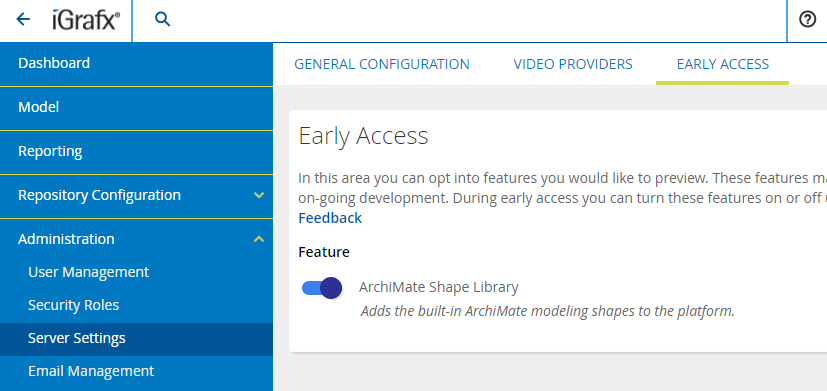
Early Access provides an opportunity to explore our latest features before they are released to the world! These features are still in-development, so we would love your feedback.
How to enable Early Access features
- Go to
Administration→Server Settings - Navigate to the Early Access tab
- Toggle the Early Access features that you would like to enable
Display Fields
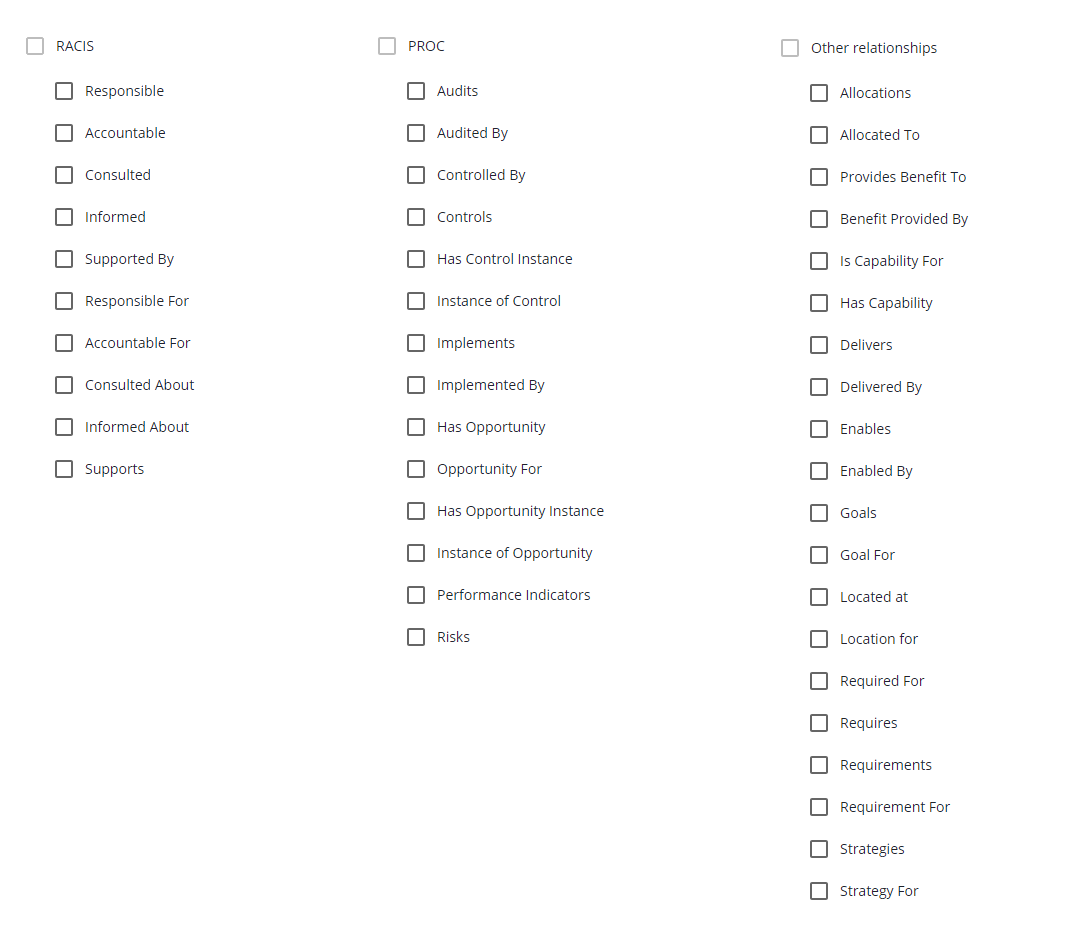
Display Fields allows users to see additional data about a described diagram element at a glance. This includes RACIS, POC (Risks, Performance Indicators, Controls, Opportunity), Other Relationships (Benefit, Goals, Requirement), Described Object Custom Properties, Diagram Element Custom Properties and Shape Numbers. Learn more about these great features below.
Modes
Display fields have been updated to have two different modes: All Shapes and selected shapes. These modes are controlled by what you have selected in the diagram. It is possible to turn on the same fields in both All Shapes mode and shapes mode, resulting in duplicate data being shown on the diagram, with a few exceptions. (Describes, notes, and links indicators are only on the All Shapes level).
All Shapes Mode
If you have nothing selected, you are in All Shapes mode. This means that any changes you make here will apply to every shape in the diagram (existing and any new shapes going forward).
All Shape fields can't be selected in the diagram and moved around. This is because there is one configuration for every shape, and they can't be set on a per shape bases. At this time, there is no way to turn off an All Shape field for one or more shapes.
Shape(s) Mode
If you have one or more shapes selected, you are in shape(s) mode. Fields will only be added/configured for the selected shapes.
Adding or Removing fields
To add a new field, open the display fields panel and click the field you want to add.
At the top, there is a search bar that will allow you to find the field that you want to turn on or off. This is a case-insensitive search that updates as you type. Pressing the 'esc' key or clicking the X will clear the search bar, showing you all the possible fields. If there are no results, the box will be empty. All sections will automatically be expanded while searching. Empty or filtered-out sections will not be displayed.
Fields with an expander located next to their name are used to let you know that it is a container of a certain field type. The expander will default as collapsed. Clicking it will expand the section and clicking again will collapse.
If you don't want to manually expand one or more of the sections, you can click the expand all icon, located to the right of the search bar. This will expand all sections in the panel. The expand all icon will turn into a collapse all icon, collapsing all sections when clicked. The default behavior is to prioritize expanding all if all sections are not expanded, only showing collapse all if everything is expanded.
Turning fields on not showing anything in the diagram
By default when turning on a field, the toggle for "Show items with no data" is off. If there is no data for that field nothing will show up on the diagram until either data is set for that field or the toggle is enabled.
Selecting Fields in Display Fields Panel
Added fields show up in the active fields list on the configure page. To get to this page, click the Configure button at the bottom of the landing page. These fields can be clicked on to select individual fields or "ctrl + left-click" to select/unselect multiple fields for configuration.
Configuring fields
The top portion of the display fields configure page contains the configuration section. This section can be used to turn the field into an indicator, toggle the field's label on/off, show the field even if it has no value, define a collapse limit (only in All Shapes mode) or change the field's placement.
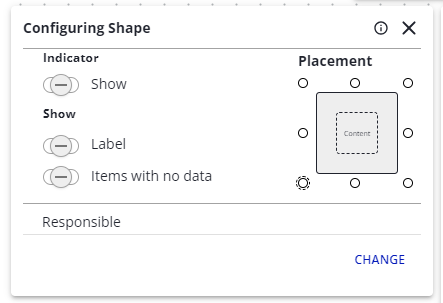
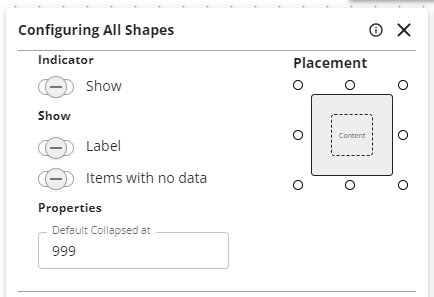
To change these options, one or more fields need to be selected from the active fields list below.
Indicators
Clicking the indicator toggle turns the field into an indicator. Indicators are followed by their label, which can be toggled off.
The indicator toggle is disabled when indicators to be shown is the only option (notes, links, describes, shape numbers)
Label
Defaults on to show the label, but can be toggled off to hide the label.
Items with no data
Defaults to off for the Items with no data toggle which controls whether or not to show the field when even if it has no data associated with it.
Disabled vs Indeterminate Toggles
If one or more field does not support a config option, such as with Describes Icons which do not possess a label or data, the toggle will show disabled and will do nothing when clicked. In order to change it for other fields if multiple are selected, the field that disables that toggle must be unselected first.
If two fields of conflicting state are selected, the toggle will show indeterminate. Clicking the indeterminate toggle turns the toggle on for all selected fields.
Default Collapse Limit
Fields that are relationships (Responsible, Accountable, Consulted, Informed, and Supported By) or Custom property Relations respect a collapse limit value. The limit, defaults to 999 so that new/existing diagrams will still show them as expanded. By changing this number, you can have them on the diagram load to default collapsed instead of expanded. They will collapse if the number is equal to or greater than the number of relationships or relations.
For example, a Responsible relationship with 10 objects and a default collapsed limit of 15 will be expanded on load. If the collapsed limit gets changed to 10 it will be collapsed on load.
The default collapse limit field is only available in All Shapes mode since it affects all the fields in the diagram regardless of mode, and can take any whole number value in the range of 1 to 999.
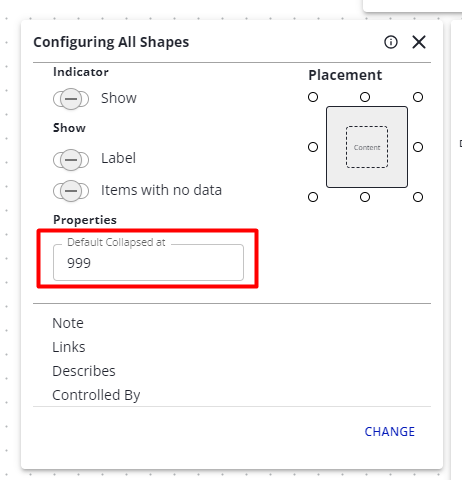
If you double-click an expanded field it will let you see it in a collapsed state i.e. (Responsible (2)), letting you know there are two objects in the relationship, and double-clicking a collapsed field will re-expand it. (Note: the collapse limit will collapse or expand these fields again on load based on the number of relations they have)
Placement Table
The right side of the configuration section contains the placement table. If you click a dot in the placement table, the field will move to that field location on the selected shape(s) or on every shape. This will happen regardless if something is already located there or not.
Shape Numbers
Shape numbers can be toggled visible by entering shape number mode via the icon, then clicking the Toggle Shape Number Visibility (All) toggle or using the Toggle Visibility wand on specific shapes.
Be sure to click the icon again to exit shape number mode.
Shape numbers that are visible are now considered fields and will show up in the active fields list in shape mode (one or more shapes selected).
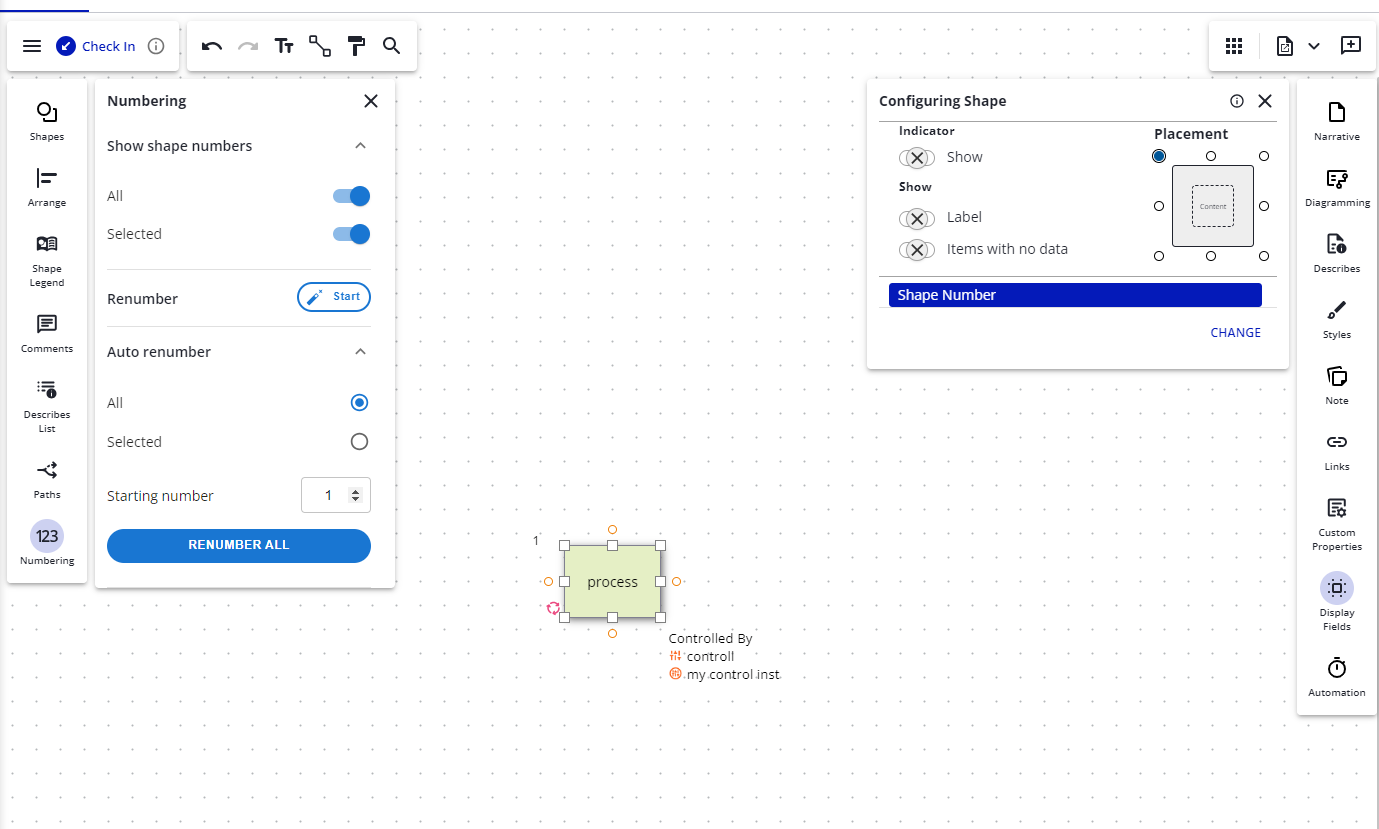
Positioning can now be set by selecting the shapes you want to change its position for, selecting the shape number, and clicking the placement dot for where you want it to live. It can also be moved on the diagram to its desired location.
Default Field adding order/positions
There are 8 positional slots for each shape, as reflected by the placement table. Fields are added in the following positional order unless moved to another slot, in which case the earliest order spot will be filled the next time a field is added.
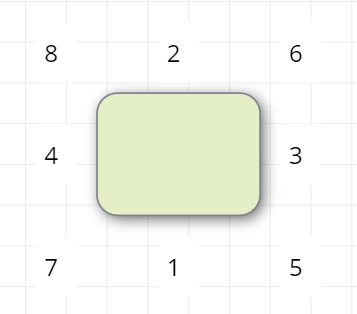
If all positions are filled, it will place newly added fields at the first location stacking on top of existing fields at that location.
Even if there are more fields than positional slots, fields can still be manually dragged to other better positions after adding (This only applies to shape fields, not all shape fields).
Merging Fields
Only fields of the same type (All Shapes or shapes) can be merged together. Any fields at the same location or dragged to the same location will not auto-merge. If you merge a field the label, indicator and data are still considered separate in the merged field. This means that if you have data for one of the fields and no data (with "Items with no data toggle enabled) for another it will result in both showing up in the merged field. It won't just show the data for the field with it unless you turn off the toggle ("items with no data") which will hide the "None"
How to merge
First, you need to select a shape that has 2 or more fields attached to it. After opening the display fields panel and making sure you are on the configuring page, select multiple fields in the panel (ctrl + click). Once you have selected all of the fields you want to merge, select the placement dot you want the fields to merge at. The shapes will then be merged at that location.
All shape fields can also be merged this way.
How to un-merge
First, you need to select a shape that has a merged field shape. After opening the display fields panel and making sure you are on the configuring page, select the field you want to unmerge and select a placement dot. This will remove the selected field from the merged shape and move it to the placement dot location.
All shape fields can also be unmerged this way.
Merge order
Merge order currently is based on the selection order of the fields you selected before clicking one of the placement dots.
Updating Merged field shapes
Fields that are part of a merged field shape can still be updated/changed the same way they could be if they were separate shapes excluding expanding or collapsing relationship fields.
Can't expand/collapse relationships
Any relationship fields that are part of a merged field cannot be expanded or collapsed. If you wish to expand/collapse, you will have to remove and re-add the shape back to the merged field. The default collapsed value must be changed if you wish it to remain that way on refreshing the page.
