Configure iGrafx for automatic user provisioning using Okta
This tutorial describes how to enable automatic user provisioning and de-provisioning with Okta. Automatic user provisioning via the SCIM protocol is only available in the iGrafx cloud offering with the Process Design module. For more information on how the technology works see this Okta document.
Prerequisites
The following items are required:
An Okta tenant
iGrafx Process Design module
Create your SCIM directory
The Admin user performing these steps requires Manage user directories server permission:
Log into iGrafx Process360 Live Process Design
Go to Administration → User Management → Directories
Click Add new directory
Enter a name for the directory
Select directory type: SCIM
Click Create directory
Write down your SCIM secret token and SCIM Tenant URL for later use
Note: To view your SCIM Tenant URL or generate a new token, click edit on the SCIM directory and then generate new token
Configure Okta for automatic user account provisioning to iGrafx:
Okta requires that user provisioning is paired with a SAML 2.0 or SWA app integration. If you already have a SAML integration set up, you can skip to Enabling Provisioning
Creating your app integration
In your Okta Admin Portal, navigate to Applications → Applications and click on Create App Integration

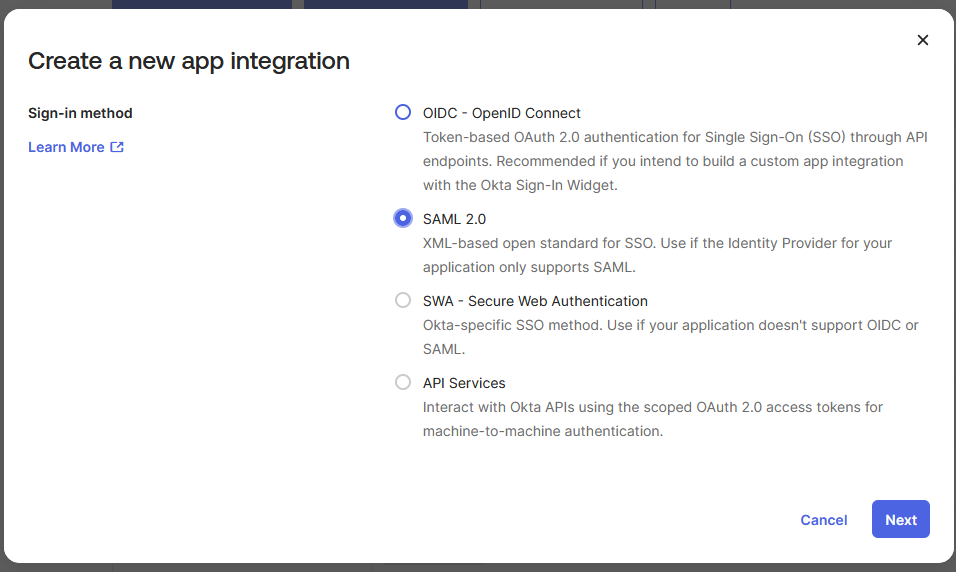
Select SAML 2.0 and click next

Fill out the General settings as applicable and click next
Configure your iGrafx Process360 Live SAML integration and click next
Optional: Fill out the Feedback section and click next
Enabling provisioning
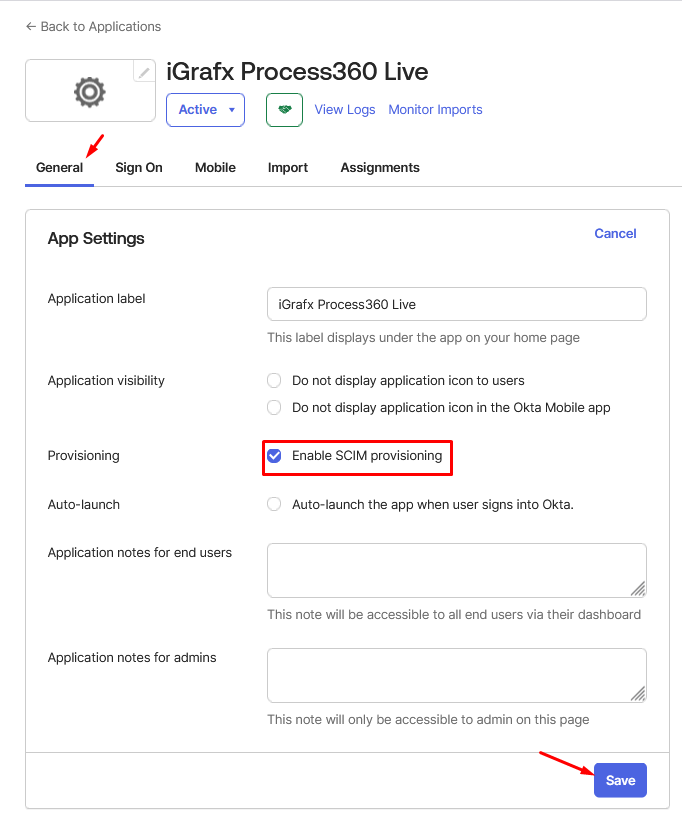
Navigate to the General settings tab and enable Provisioning

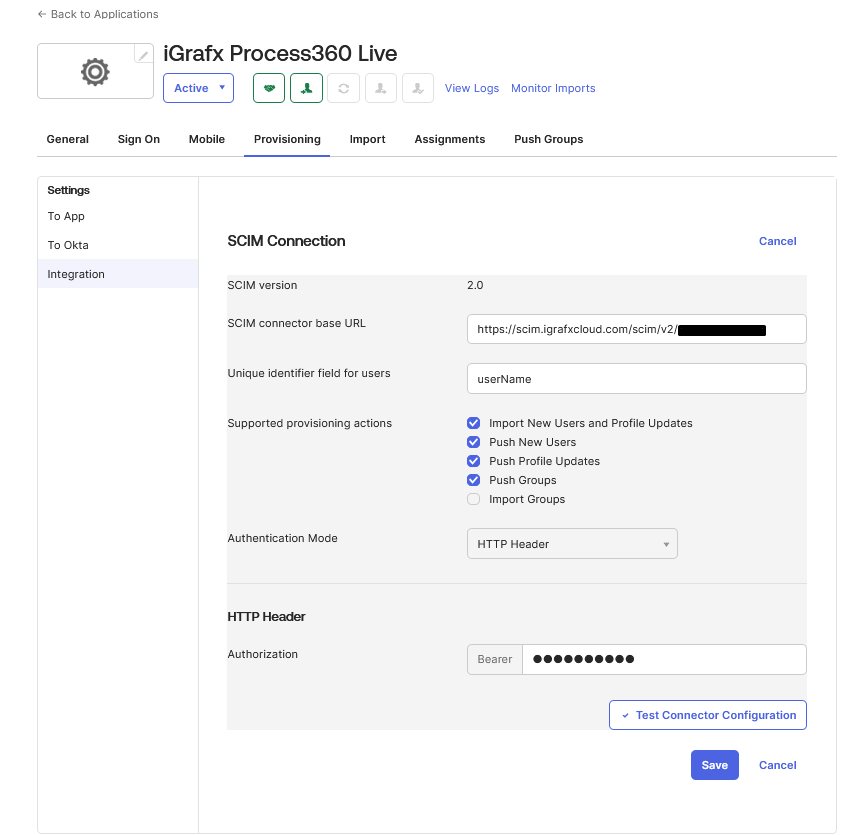
Navigate to the new Provisioning tab and click edit and set the following:
SCIM connector base URL - use your SCIM tenant URL
Unique Identifier Field for users - userName
Supported provisioning actions - check all checkboxes except Import Groups
Authentication Mode - HTTP Header
Authorization - use your SCIM secret token

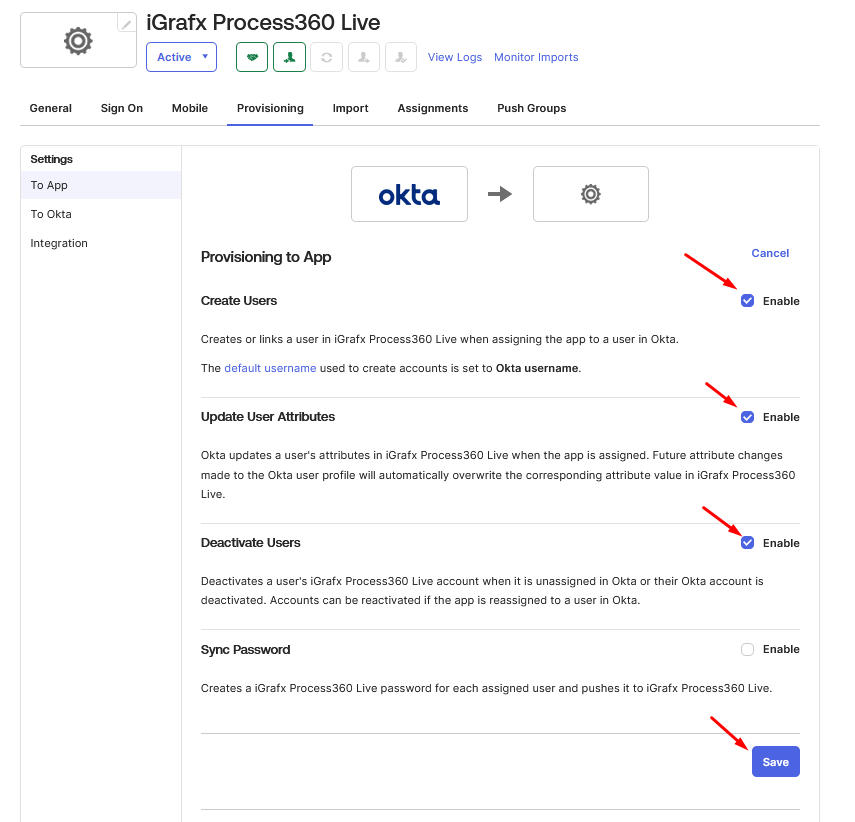
Two new tabs sections should be visible now: To App and To Okta. Click To App
Edit the Provision to App settings and enable Create Users, Update User Attributes, and Deactivate Users

Optional: If you have created any users in iGrafx before enabling synchronization, you can import them now → Navigate to the Import tab → Click Import Now.
Okta will get a list of all existing users that are not assigned to the app integration. Select all the users you want to manage via Okta's automatic user provisioning.
Once the assignments are selected and confirmed, any users you have assigned to the application will now show up in the Assignments tabTo provision new users in the application: Navigate to the Assignments tab -> Click Assign:
If Assign to People is selected, the selected user(s) will be provisioned to the application.
If Assign to Groups is selected, all users in the group will be provisioned to the application.
Note: If a user is removed from the group or explicitly removed from the application, their user will be disabled. Disabled users do not consume a license.
To provision groups and group membership:
Make sure the group is added in the Assignments tab
Navigate to the Push Groups tab and click on the Push Groups button:
If Find groups by name is selected, you can select groups directly by name
If Find groups by rule is selected, you can create a rule that will select groups automatically if they match the conditions
Once one or more groups have been selected to push, those groups will be created in the application and the users will be added as members
