In the User Management pages, you can add and edit users, create groups and manage the users within them, and import and sync users from existing database user directories. The following sections describe these tasks and the pages that enable them.
Adding and Changing User Information
If you have administrator privileges in the iGrafx Platform, you can add individual users and modify user information on the User Management page.
You can freely manage local users and groups in the iGrafx Platform. Users and groups imported from an external directory (e.g. Active Directory) can only be managed in the directory service itself from where the iGrafx Platform will import/synchronize the changes and update the information.
Local Users and Groups
Adding a User
To add a new user, do the following:
Choose the Administration area, and then User Management.
Click the Users tab.
Click CREATE USER IN LOCAL DIRECTORY.
Type a username and password in the Username and Password fields. Type the password a second time in the Confirm Password field.
Optionally:
Type the user's First name, Last name, and Email address in the fields provided.
Check options related to the user password and email invitation.
Click the CREATE USER button.
Changing User Information
To change the account details of an existing user, do the following:
Choose the Administration area, and then User Management.
Click the Users tab.
Locate the user in the list by scrolling, using the alphabetical "Jump to" links, or by typing in the search box.
Click Edit in the user table's Actions column.
The User Details page appears.
On this page, you can change the Username, First name, Last name, and Email values for the user. You can also change their password by typing a new one in both the Change Password and subsequent Confirm Password fields.
Also from this page, you can view the user's assigned Server Roles, Repository Roles, and Linked Resources.
Clicking the links under the Server Roles and Repository Roles headings will take you to the appropriate Security Roles page, where (if you have the appropriate permissions) you can change the privileges associated with the linked role, or add additional roles that you can assign to this user.
Under Linked Resources, you can click to view details on any repository labor resources linked to this user, and remove those links by clicking Remove link. Clicking the Add Linked Resource link brings up a box that lets you choose a repository, then choose an existing resource or an object tree location for a new resource to link to this user. For more information on these tasks, see Linking Users to Labor Resources or the "Linking Users to Resources Automatically" topic on the Managing Repository Resource Types page.
You can only edit those users that were added manually, through the iGrafx Platform. Users imported from a database directory do not appear with the Edit and Delete links, and must be edited by the database administrator.
You must have the appropriate permissions granted to you to set up server and repository roles, and to create resources and link users to them.
Deleting a User
Choose the Administration area, and then User Management.
Click the Users tab.
Locate the user in the list by scrolling, using the alphabetical "Jump to" links, or by typing in the search box.
Click Delete in the user table's Actions column and click DELETE again to confirm.
You can delete only those users that were added manually, through the iGrafx Platform. Groups imported from a database directory do not appear with the Rename and Delete links, and must be deleted by database administrator.
Adding and Managing Groups
Creating user groups can make it easier to manage permissions for similar sets of users, as described in Using Groups to Manage Permissions.
The following sections describe how to add, populate, rename, and delete groups in the iGrafx Platform.
Adding and Populating a Group
To add a new group, do the following:
Choose the Administration area, and then User Management.
Click the GROUPS tab.
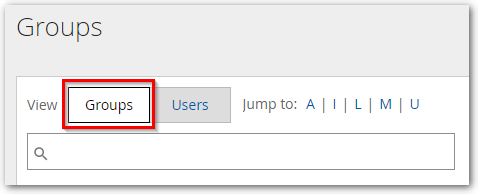
In the View area, make sure Groups is selected.
Click CREATE GROUP.
In the Create Group dialog, type a name for the group in the Group Name box, then click CREATE GROUP.
Your new group is added to the Groups list, and an Add User/Group button appears underneath it:
To begin adding users, click ADD USER/GROUP.
The Add Users and Groups dialog box appears
Add one or more users and groups:
Type the name of an existing user or group in the Search field and select it when found
Click the Search button and select a user or group
Click CONFIRM SELECTION.
Managing Groups by User
You can manage the groups that a specific user belongs to by viewing the groups by username, as follows:
Choose the Administration area, and then User Management.
Click the GROUPS tab.
In the View area, make sure Users is selected.
The list displays all users and the number of groups each one belongs to.
Locate the user for whom you want to manage groups in the list by scrolling, using the alphabetical "Jump to" links, or by typing in the search box.
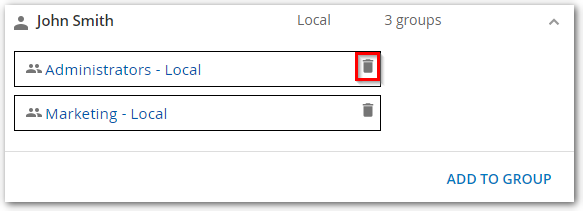
Click a user row to display the groups that user is currently assigned to.
Add or delete groups as necessary:
To add this user to a group, click ADD TO GROUP under the user name.
Add the user to one or more groups:
Type the name of an existing group in the Search field and select it when found
Click the Search button and select a group
Click CONFIRM SELECTION.
To remove this user from an assigned group, click the trash can icon at the right of the box for that group.
Renaming or Deleting a Group
You can rename and delete groups that were added through the iGrafx Platform on the Groups page. You cannot rename or delete groups that were imported from a database user directory. (See the next topic for more information.)
Choose the Administration area, and then User Management.
Click the GROUPS tab.
In the View area, make sure Groups is selected.
Locate the group you want to rename in the list by scrolling, using the alphabetical "Jump to" links, or by typing in the search box.
If necessary, expand the group row to display commands.
Either:
Click RENAME, type a new name for the group, then click SAVE CHANGES or
Click DELETE, and click DELETE again to confirm.
Adding and Managing external user Directories
iGrafx can import users and groups from an external user directory (e.g. Active Directory) using the Lightweight Directory Access Protocol (LDAP) to query information from a directory service (primarily, Microsoft's Active Directory).
We recommend that you have your user or network administrators add directories to the iGrafx Platform as described here.
Adding users from a directory involves specifying your LDAP settings in the iGrafx Platform, as follows:
Choose the Administration area, and then User Management.
Click the DIRECTORIES tab.
In the View area, make sure Groups is selected.
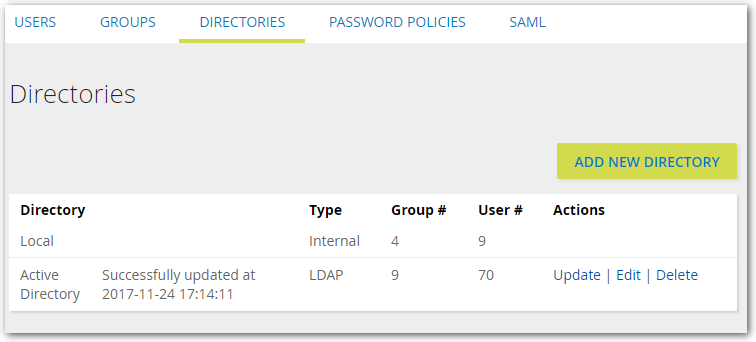
The Directories page appears similar to this screenshot:
Click ADD NEW DIRECTORY.
In the Directory Name field, enter a display name for your directory, which is used to identify the directory in the iGrafx Platform user and group management pages.
Select the Directory Type, this will fill in the additional fields with common defaults for the selected directory provider. The default is Active Directory.