Custom dashboard
Once your data has finished indexing you can see different data shown inside the Dashboard of your project like the image below.
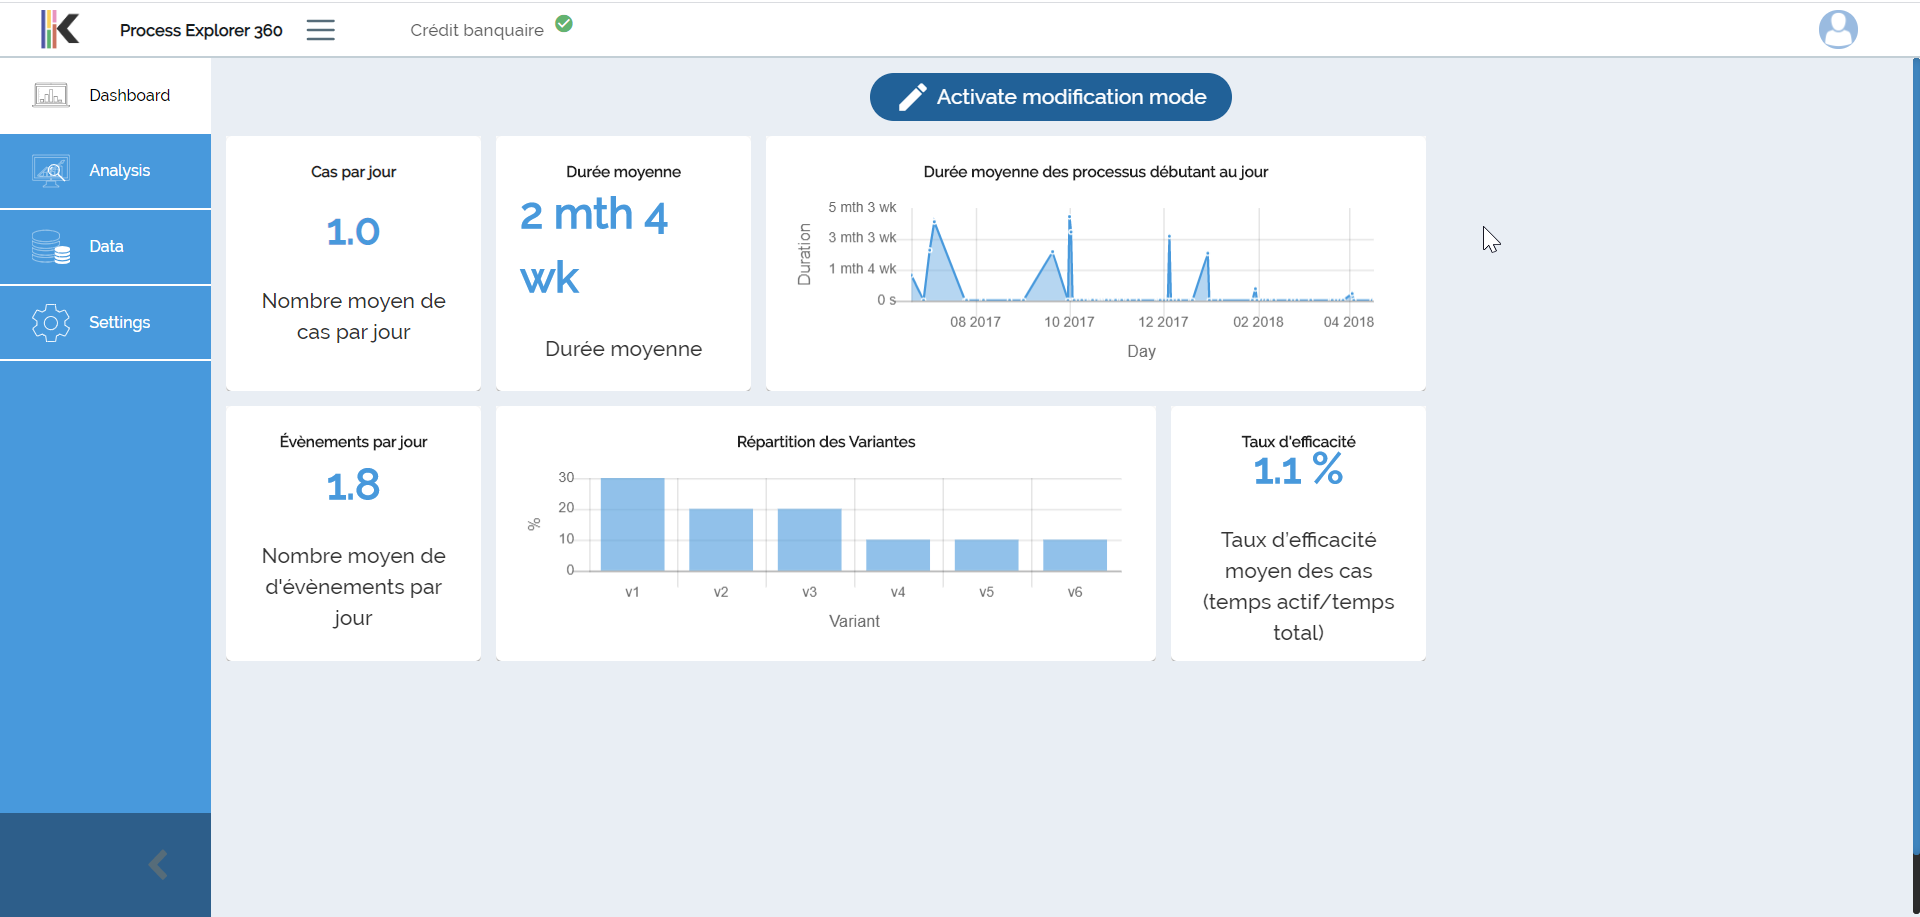
Activate "modification mode"
To start adding/modifying/deleting data as well as modifying the position of these data in your dashboard you first need to be an administrator of the project otherwise you will not be able to see the button:

When you see it, you can just click it and you will activate the dashboard modification mode.
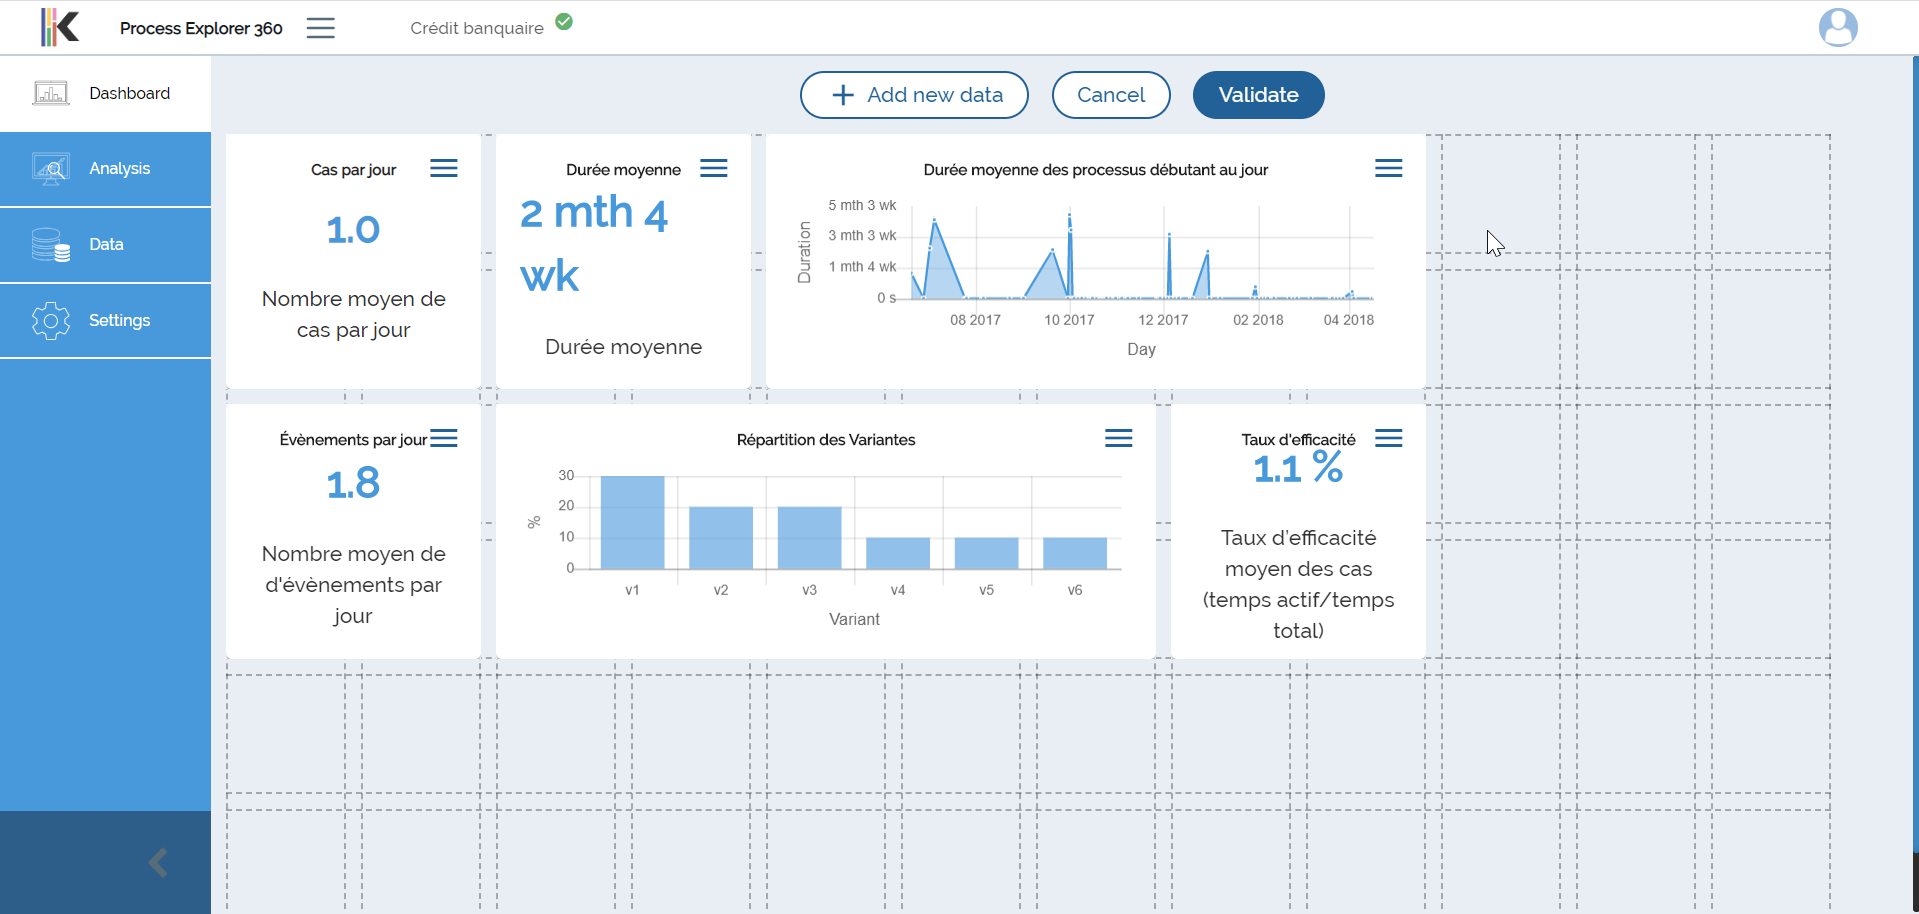
Add a new data widget
Open the creation popup
Now that you are in modification mode, you can add new data to your dashboard. Start by clicking on the Add new data button.

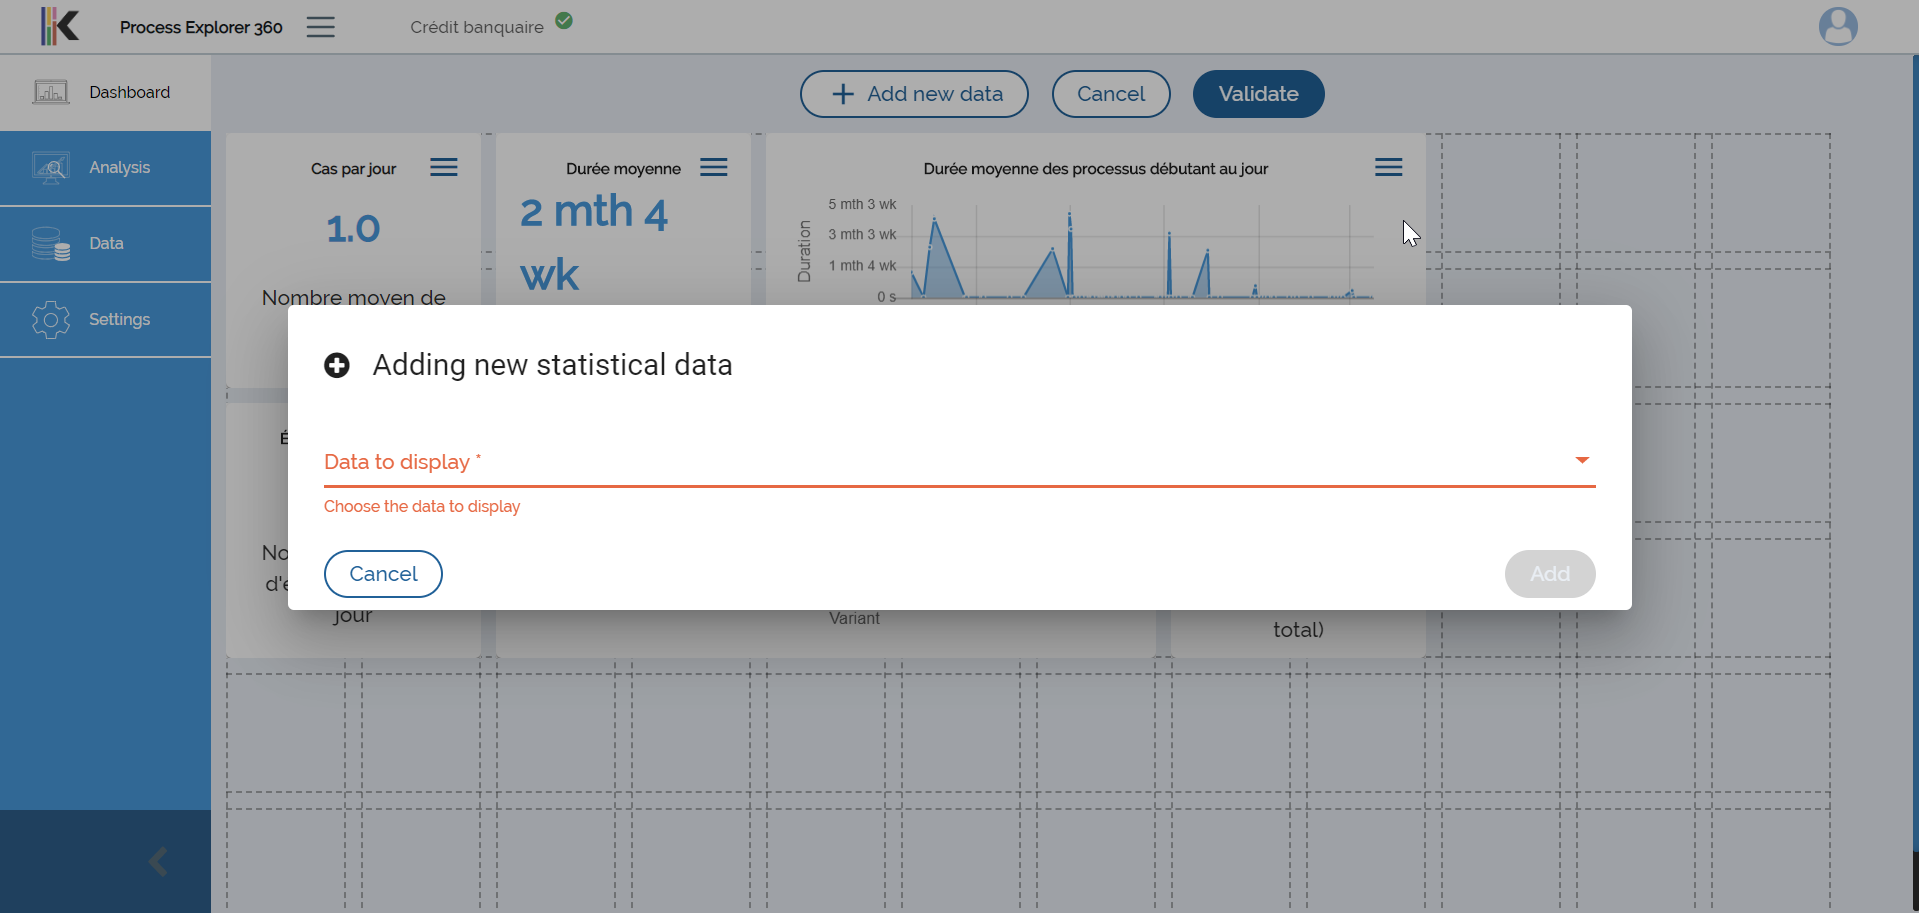
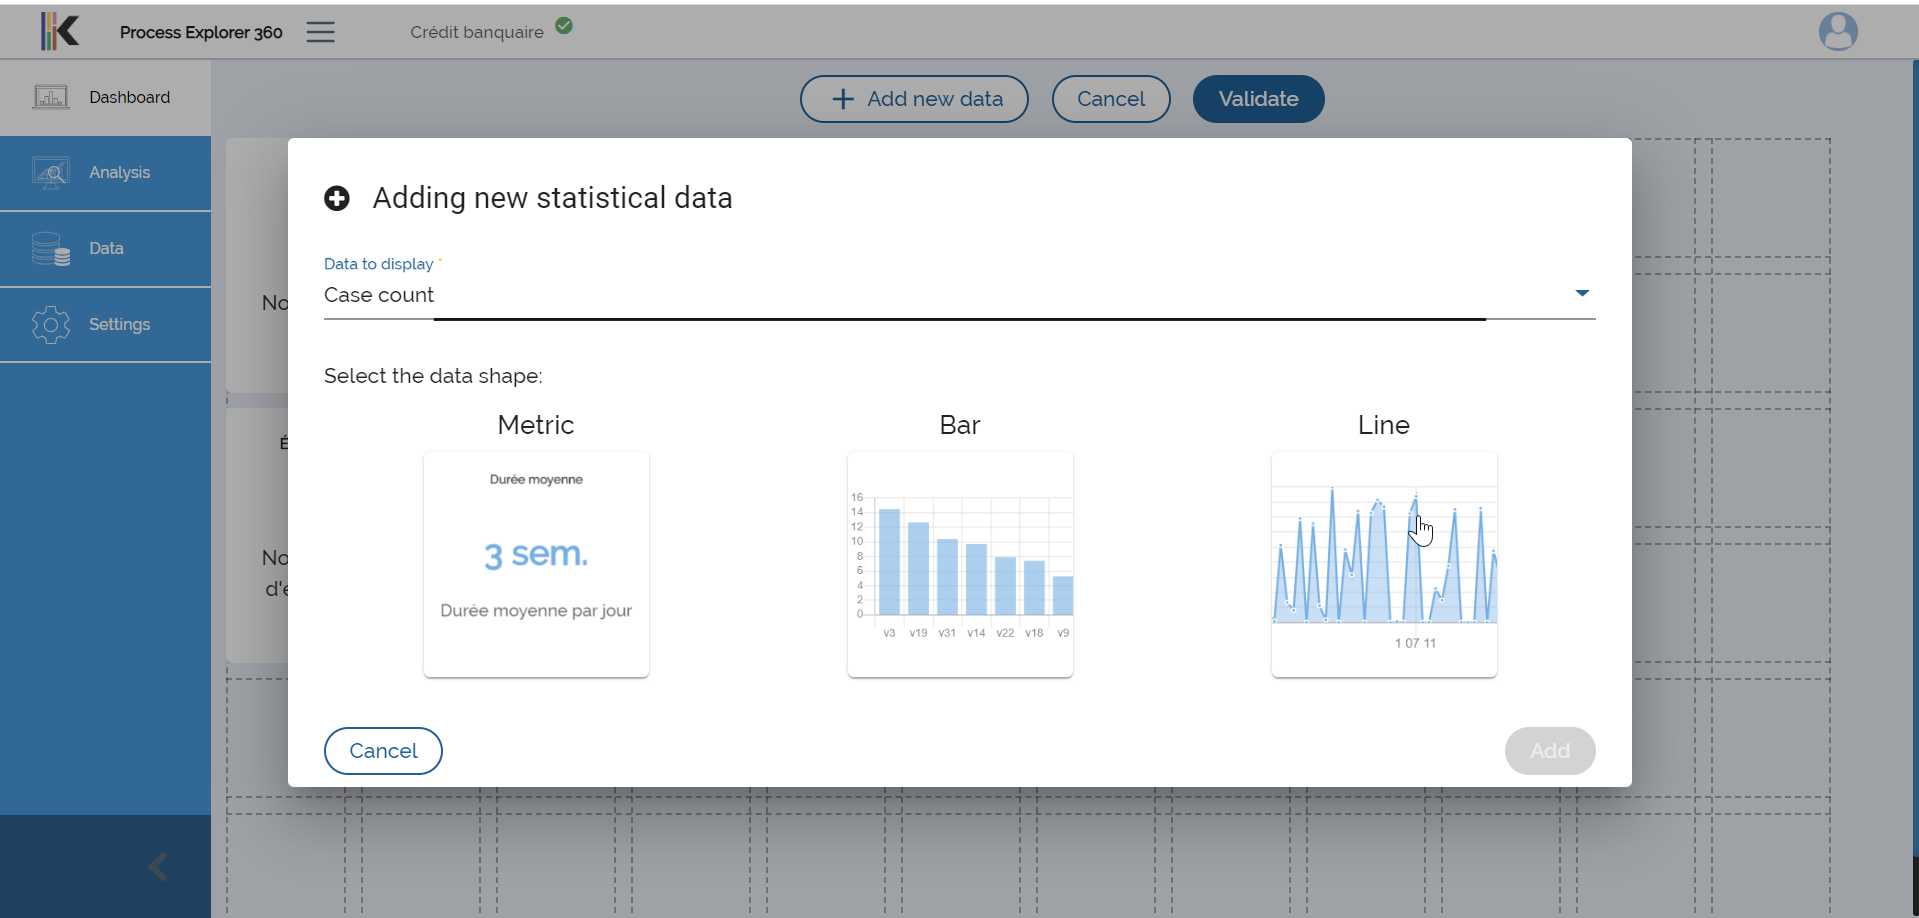
It will open the popup to create a new data widget data:
Select the data source
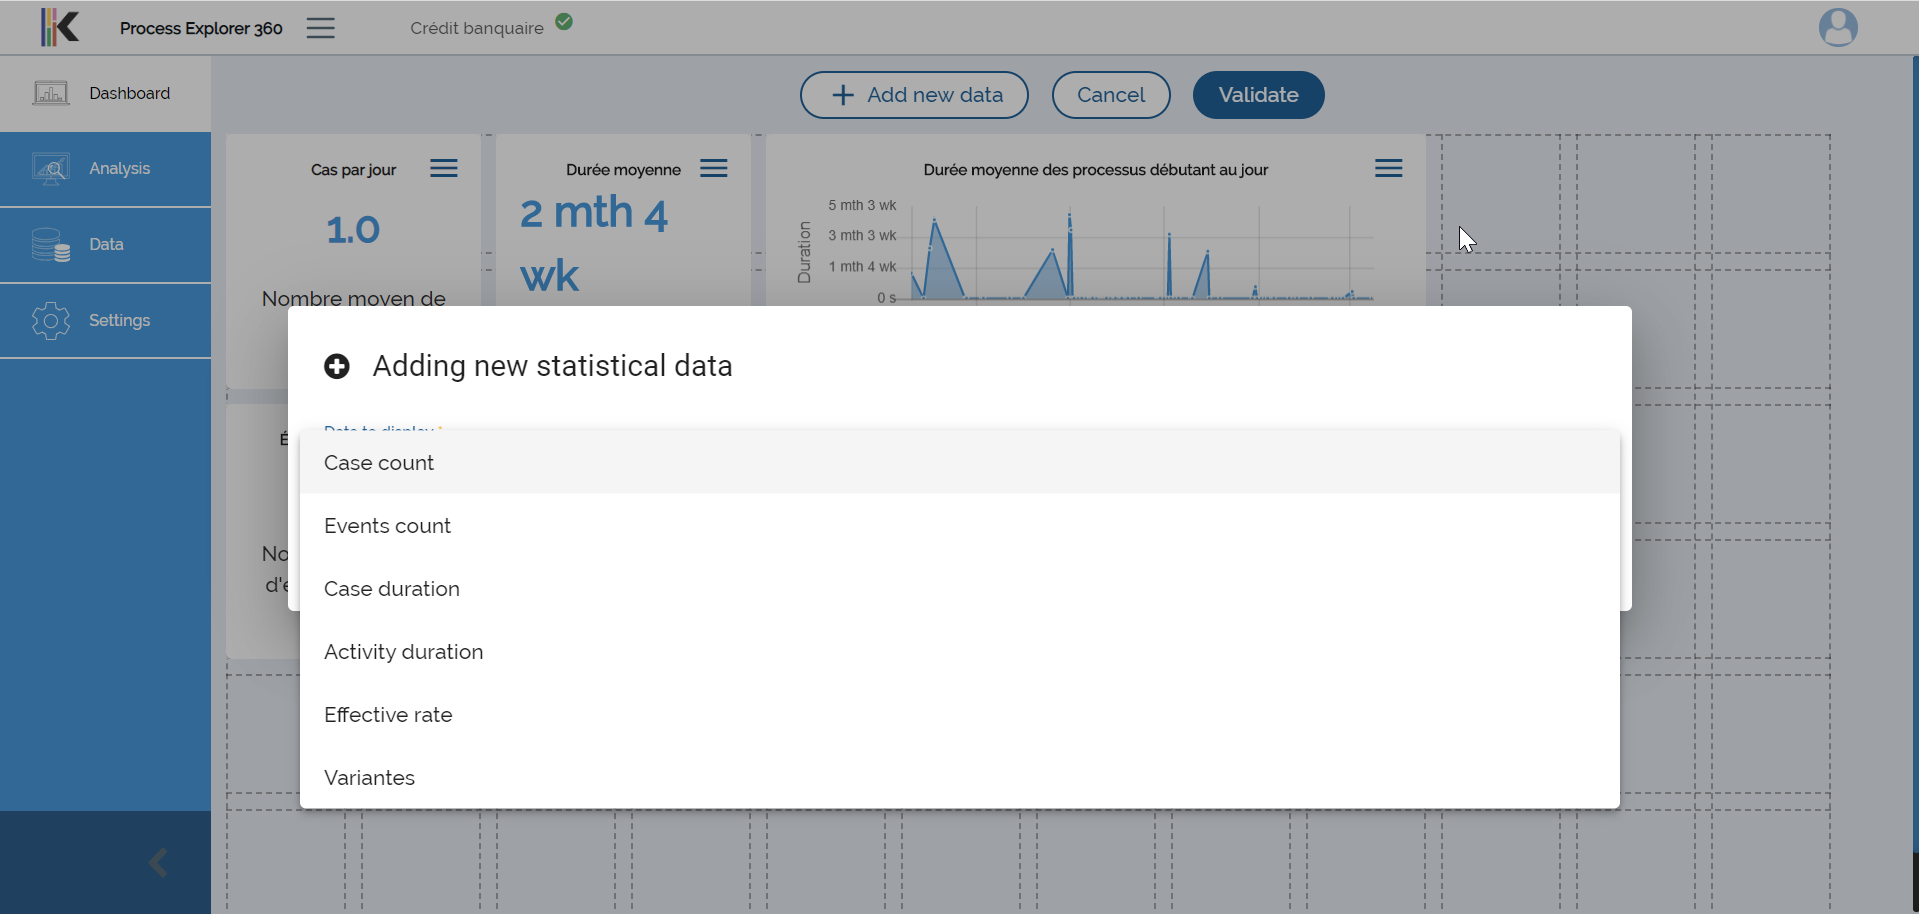
After opening the creation popup, the first step to add a new data widget is to select which data you want to visualise.
You can choose from the list presented to you:
Select the shape of the data
The next step is to select the shape your data is going to take. Depending of the data source only certain shape will be available.
Just select the shape and the last step will appear.
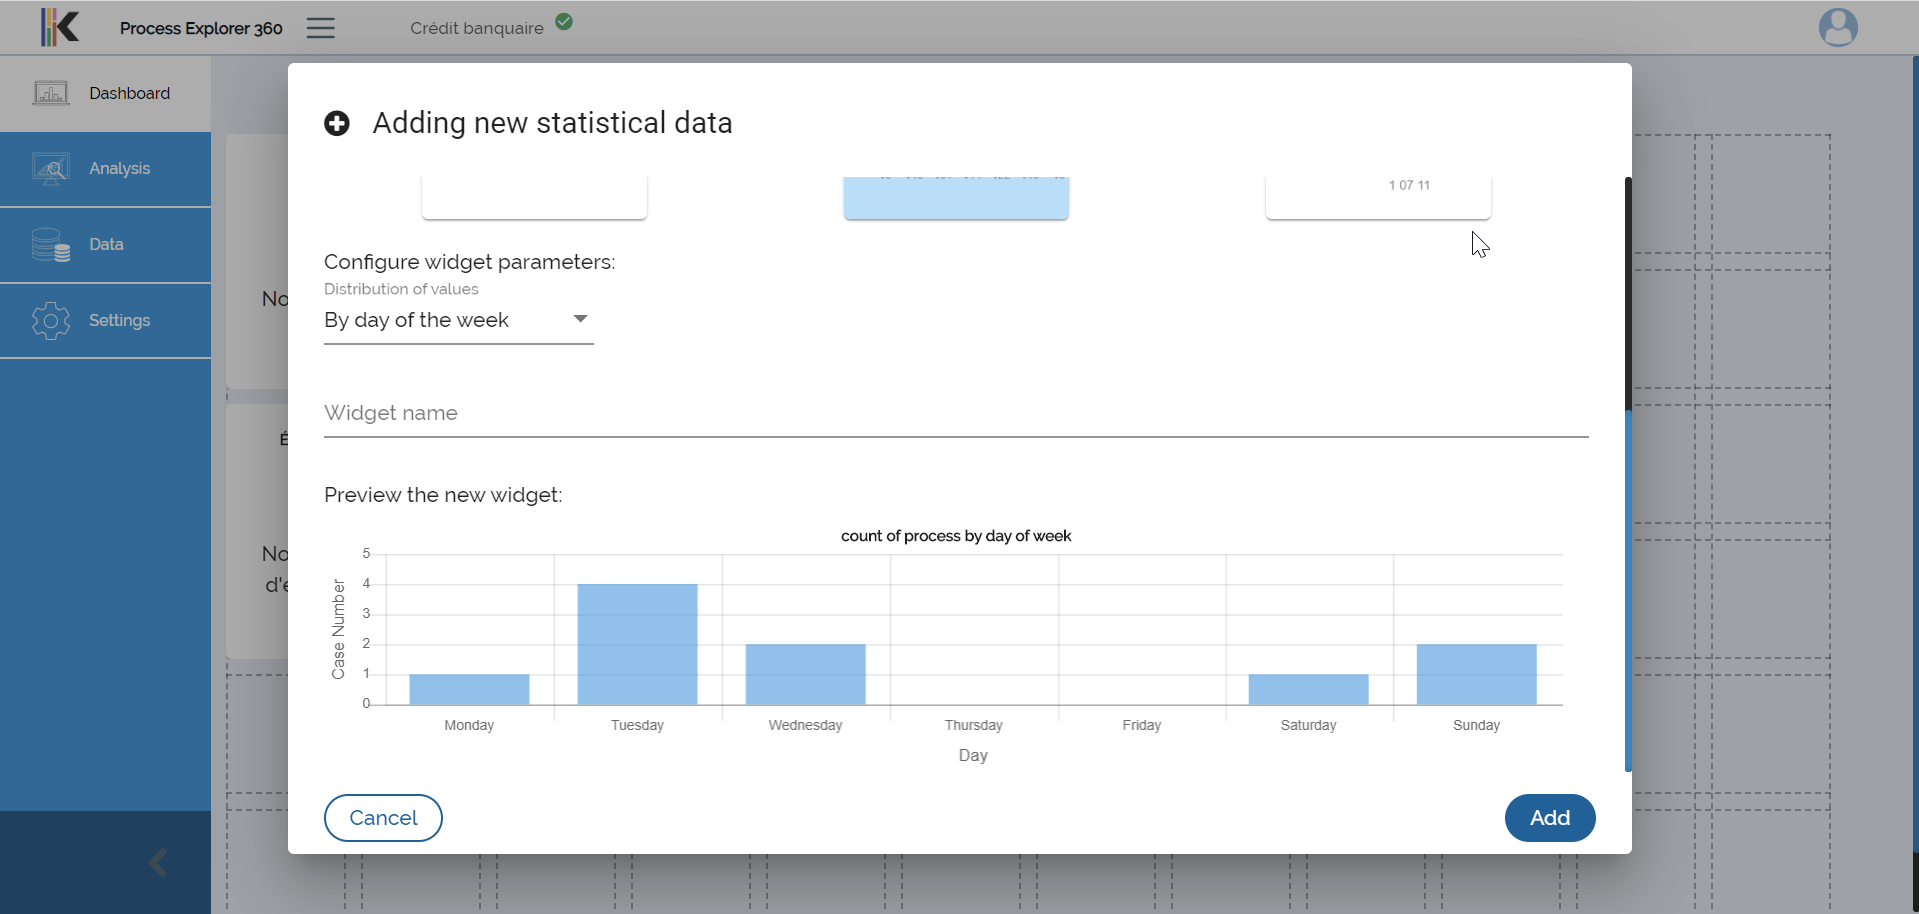
Set the different parameters and preview your data
The final step for the creation of your data are the setting of different parameters, most of them are predefined but can be modified.
Each data source and shape has a different set of available parameters.
It is possible to set the name of the data widget by yourself but if you let the field empty, it will be auto-generated.
Before creating your data widget, you can preview what your data widget will look like at the end of the form like shown below:
Finishing the creation and save your modifications
When you validate the form to create the data widget, the new data will be shown in your dashboard.
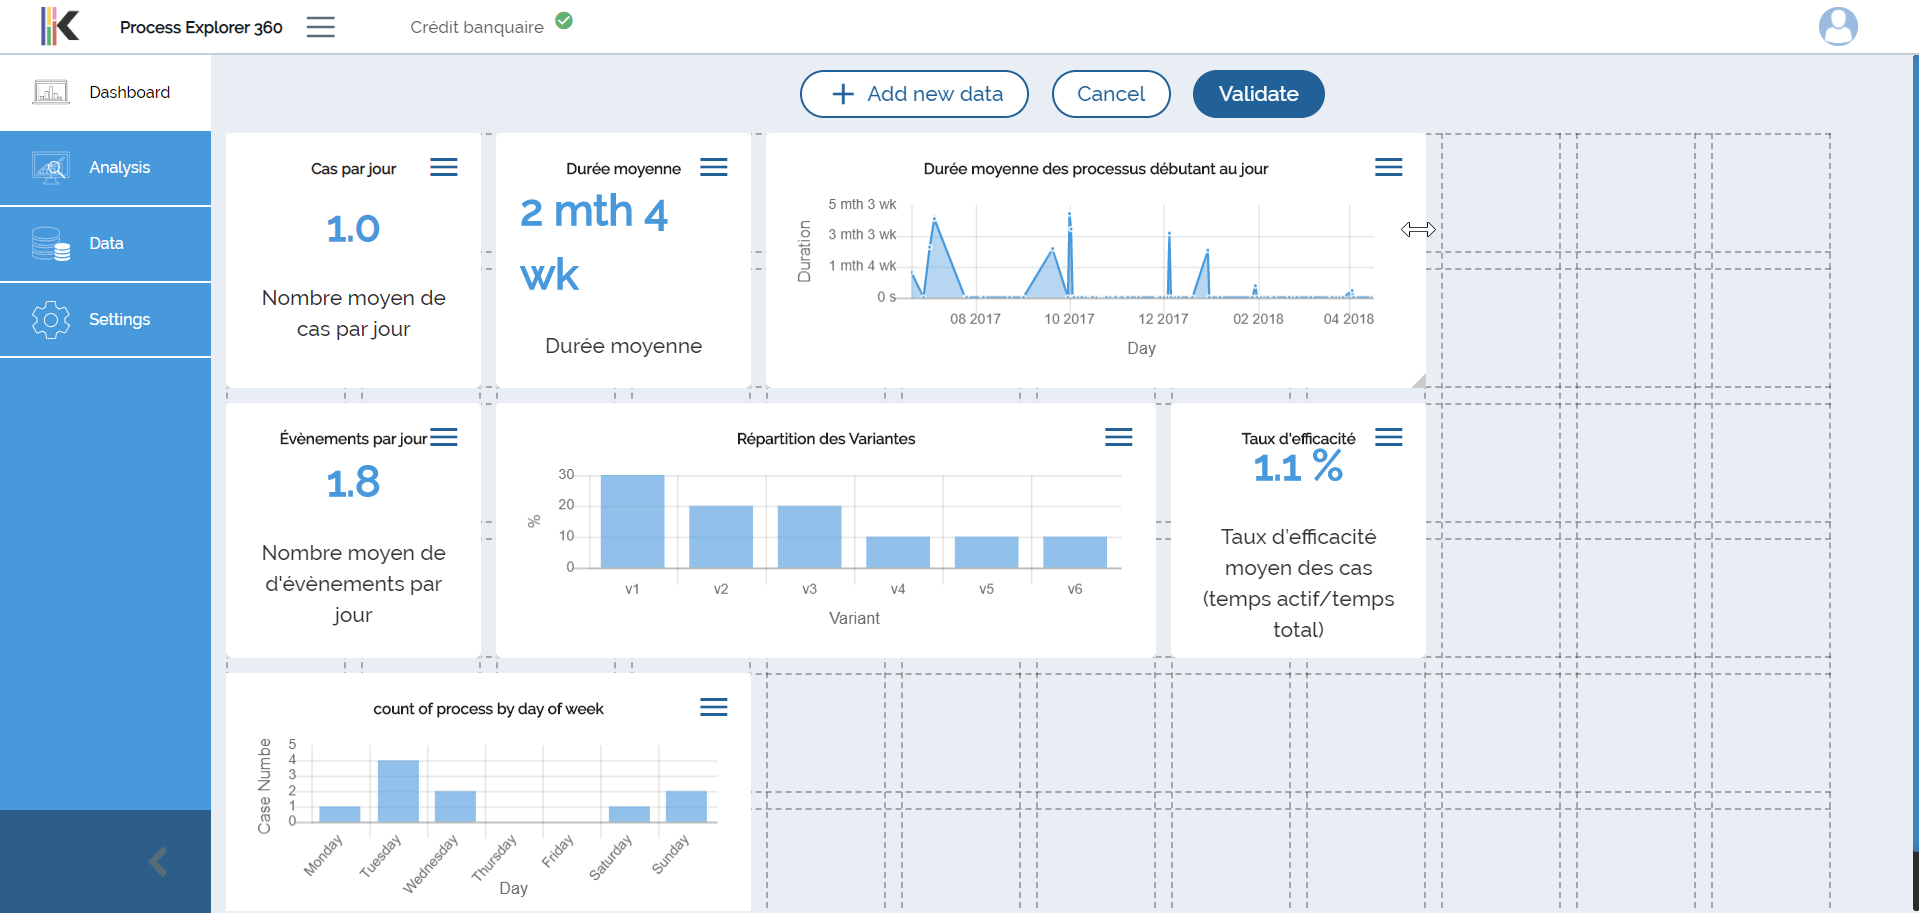
If you want the new data widget to be truly added to your dashboard, you need to save your modification by clicking on the Validate button at the top of the dashboard.

It will save all your modification of the dashboard (data widget modification/addition/suppression) and exit the modification mode.
Modify a data widget
Open the modification popup
To open the modification popup you need to click on the menu icon  of the data widget you want to modify.
It will open the following menu, you just have to click on the Modify button to open the popup to modify the content of your data widget.

Validate the modifications
The same way as the creation of a data widget, you still need to click on the Validate button to save your modifications.
Delete a data widget
Delete the data widget
To delete a data widget, open the desired data widget menu by clicking the menu icon .
In the now open menu you will just have to click on the Delete button.
It will open a confirmation popup to confirm that you want to delete the aforementioned data widget.

Validate the deletion
After confirming the deletion of the data widget, you need to confirm your deletions by clicking on the Validate button to save any modifications made on the dashboard.