Configure risks
Define the building blocks every Risk and Risk Instance in the repository uses: types, categories, the impact/likelihood/appetite scales, and the risk matrix.
Prerequisites
- The Manage Risk Configuration repository permission — see Assigning Security Roles.
Steps
In the Repository area, select Risks.
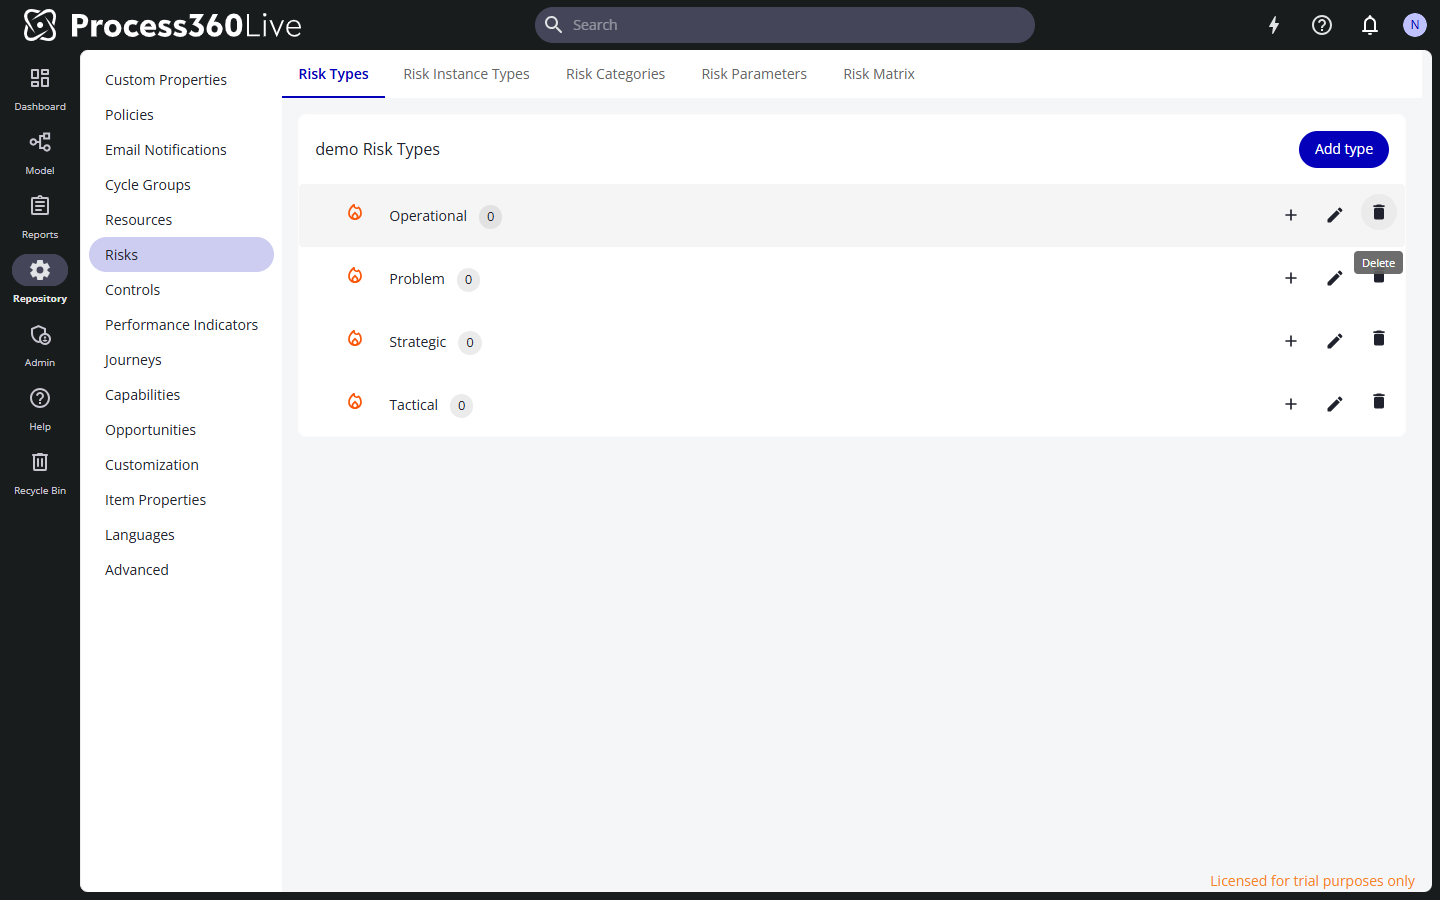
Define risk types and risk instance types
Every Risk has exactly one risk type, chosen when the risk is created and changeable later; Risk Instances work the same way with their own type list.
- On the Risk Types tab (or Risk Instance Types), click Add type for a new top-level type, or Add subtype on a row for a child type.
- Enter a Name, and optionally a non-zero Risk Value. The value feeds the inherent risk calculation — see Residual risk calculation.
- Save the row. Use the row's Edit and delete actions to maintain existing types.
Define risk categories
Risks, Risk Instances, Controls, and Control Instances all share the risk categories. Unlike types, an object can have any number of categories or none.
- On the Risk Categories tab, click Add Option.
- Enter a Label, an ID (used by IQL and the REST API), and optionally a non-zero Risk Value for the inherent risk calculation.
- Keep the A - Z order or switch to Custom Order and drag rows with Reorder.
Show Category Warnings On Risk Objects flags mismatches — for example a Control carrying only the Financial category attached to a Risk carrying only Operational. It's on by default; clear it to hide these warnings throughout the repository.
Set the risk parameters
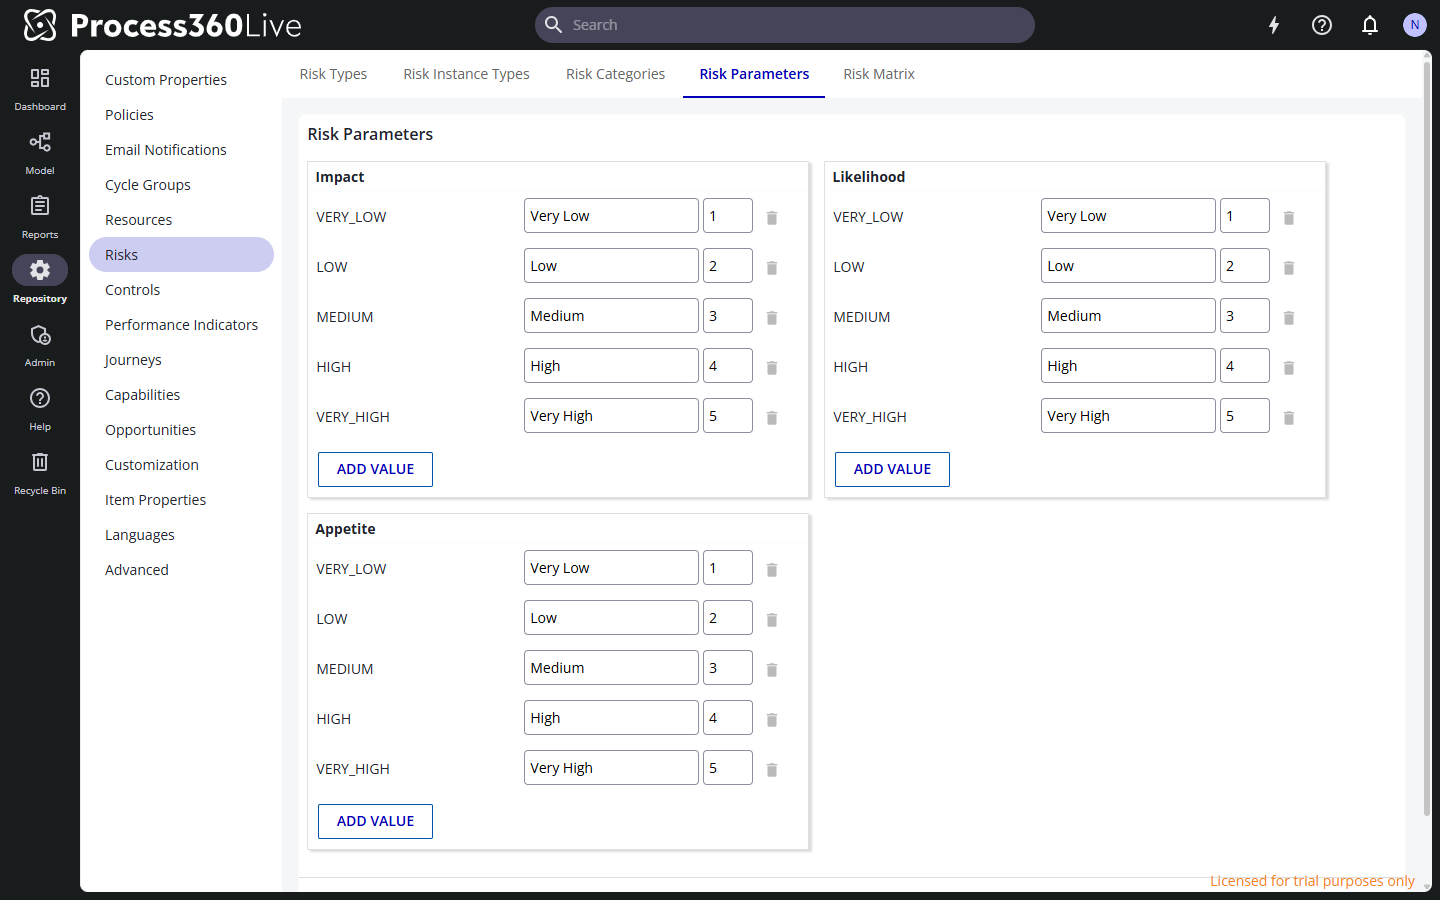
The Risk Parameters tab defines the three scales — Impact, Likelihood, and Appetite — used on risks and in the risk matrix. Each level has:
- An ID (capital letters, numbers, and underscores, starting with a letter) for IQL and the REST API.
- A label users see, such as "Very Low".
- A whole-number value from 1 to 1000.
New repositories ship five levels per scale, Very Low (1) through Very High (5). Click Add Value to add a level or the delete icon to remove one, then Save Changes. A scale must keep at least one level, and deleting a level that risk data already uses asks you to choose a replacement.
Adjust the risk matrix
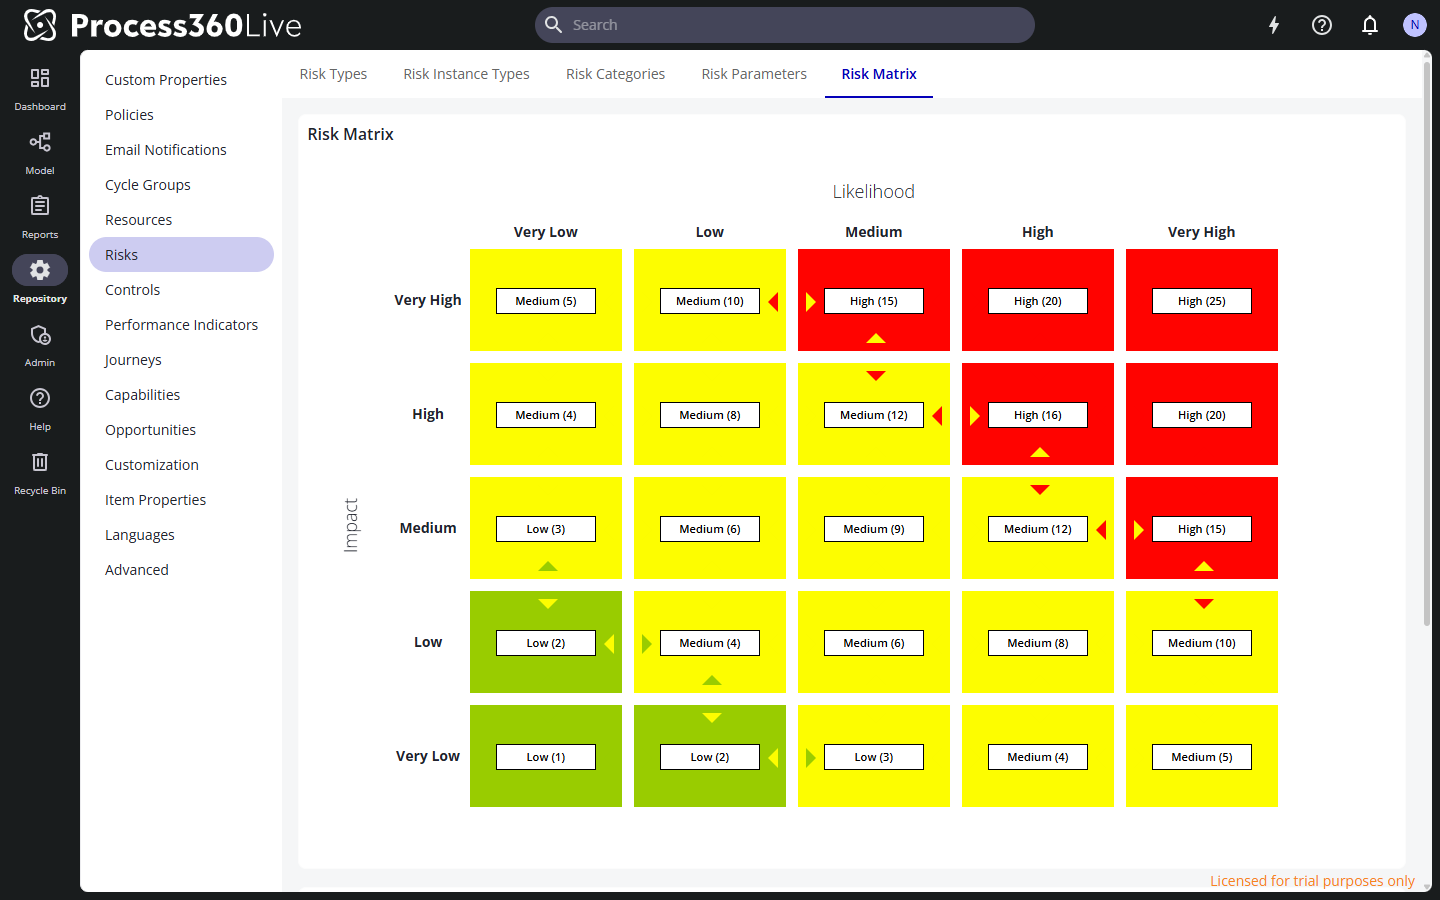
The Risk Matrix tab controls how Risk Map reports display: likelihood levels form the columns and impact levels the rows, so a risk with Very High impact and Very High likelihood lands in the top-right cell.
- Each cell starts with a value equal to its row value times its column value. Select a cell to change its Risk Cell Name and Risk Cell Value, then save.
- The Risk Ranges list below the matrix maps value ranges to colors, which color both the matrix cells and the inherent and residual risk indicators. Edit the range boundaries, select a color cell to change its color, or click Add Range for more bands.
- Click Save Changes when done.
Configure ICS risks
When the ICS Style Risks Early Access feature is enabled, the Risks page gains an ICS/BIA Risks tab — see Configure ICS risks.