Configure resources
Extend the resource type hierarchy with subtypes that fit your organization, and link platform users to the resources that represent them.
Prerequisites
- The Manage Repository Configuration repository permission — see Assigning Security Roles.
Steps
In the Repository area, select Resources.
Add a resource subtype
- On the Resource Types tab, expand the tree to the type you want to extend — Expand all opens the whole hierarchy.
- Click Add subtype on that row, type a name, and save.
The set of top-level types is fixed — Equipment, Infrastructure, IT Architecture, Labor, Location, and Organization. You can only add subtypes beneath them.
Each top-level type already carries built-in subtypes, and some of those are locked against renaming and deletion — see Delete a resource subtype. Expand the tree before you add anything: the type you need may already be there.
Delete a resource subtype
Select the delete icon on the subtype's row and confirm. You can't undo the deletion, and you can't delete two kinds of subtype:
- A subtype that resources in the repository still use.
- A locked built-in subtype. These carry a fixed meaning the product relies on, so they can't be renamed either — the six top-level types, everything under Organization (Role, Group, Job, Board, and Legal Entity), and Labor's Person, Bot, and AI Agent. The subtypes under Infrastructure, Location, and IT Architecture aren't locked, so you can rename or delete those.
Link platform users to resources
A Resource object can stand for a real person. Linking it to that person's platform account lets the product connect the signed-in user to their resource — for example when matching control validators or recording risk data. The tab also works in bulk: after importing your users — for example from Active Directory — one pass mass-creates a Labor resource for every user that doesn't have one yet.
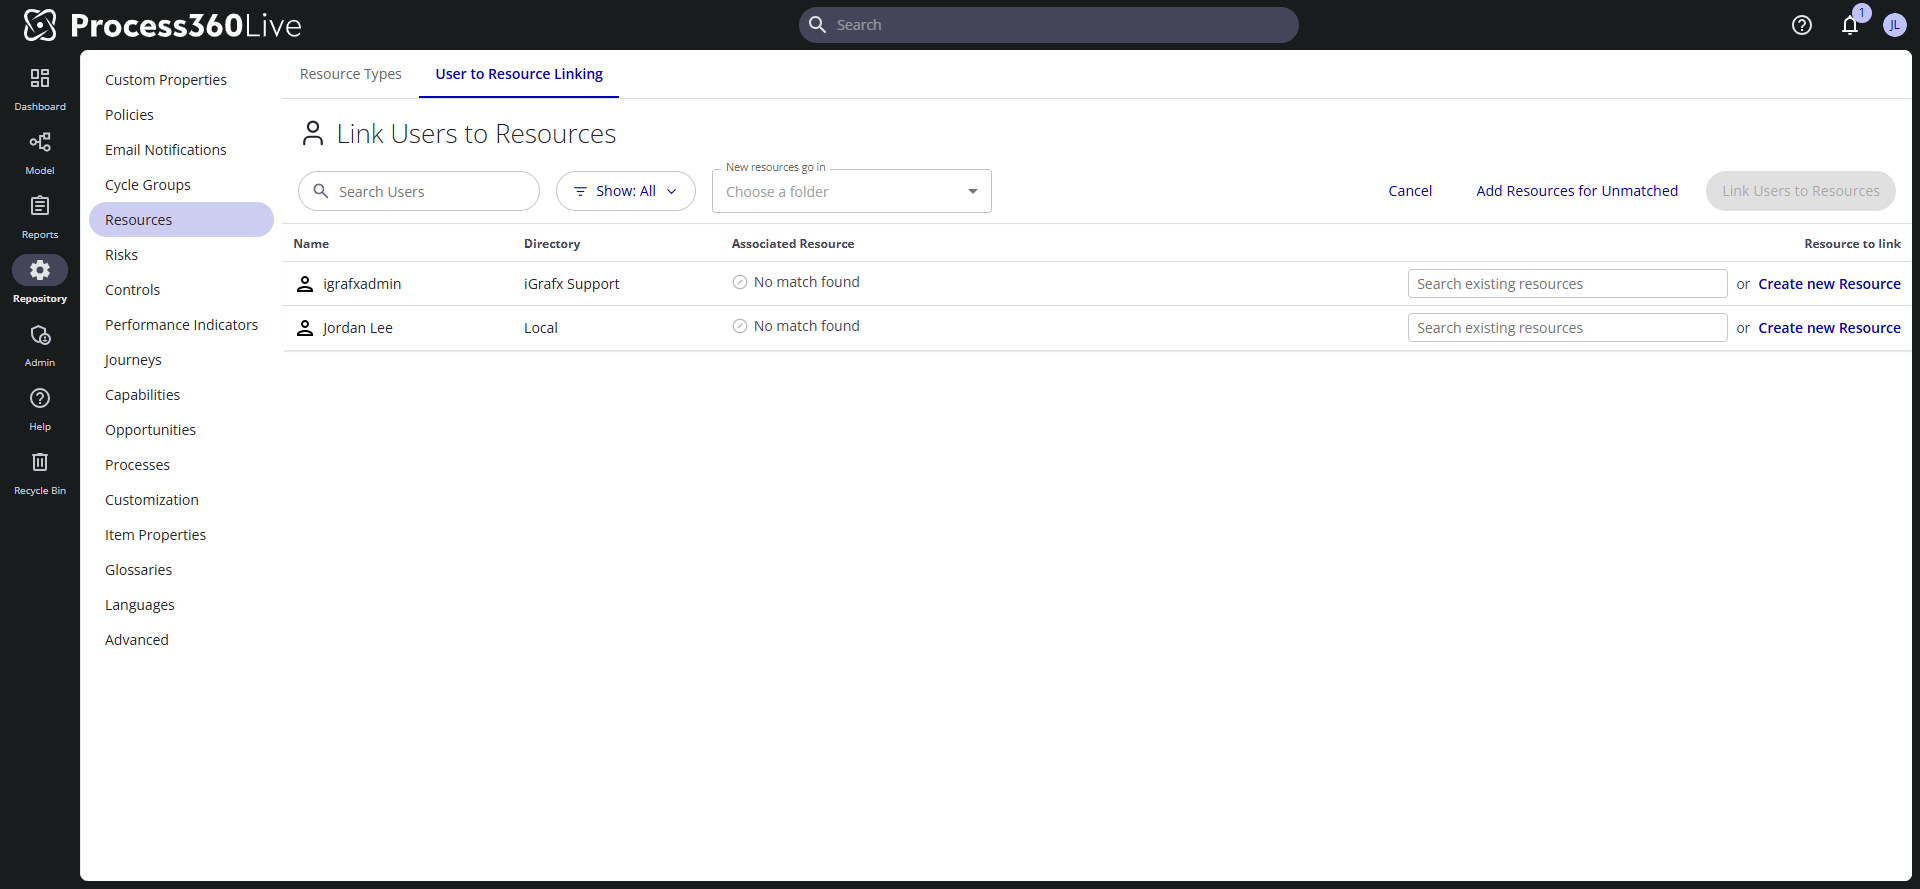
- Open the User to Resource Linking tab. The table lists each platform user, their directory, and any associated resource; filter it with View All, Linked, and Unlinked.
- Click Link Resources. The product proposes matches and switches the filters to View all, View matched, View resources to be created, and View unmatched.
- Under Choose a location for new resources that will be created, pick the folder for any new Labor resources.
- Work through the rows:
- Accept or discard each proposed match, or use a row's search box to pick a different unlinked Labor resource.
- Click Create New Resource on a row to create a resource for that user, or Add Resources for Unmatched to do it for everyone without a match.
- Click Link Users to Resources to apply, or Cancel to discard. A confirmation reports how many links were made.
Related
- Resource types — every built-in type and what to use it for
- Resource
- Work with ICS risk data
- Assess a control