Configure controls
Define the type lists, rating scale, and weighting that every Control and Control Instance in the repository uses.
Prerequisites
- The Manage Control Configuration repository permission — see Assigning Security Roles.
Steps
In the Repository area, select Controls.
Define control types and control instance types
Every Control has exactly one control type, chosen at creation and changeable later; Control Instances have their own list. On the Control Types tab (or Control Instance Types), click Add type for a top-level type or Add subtype on a row, name it, and save. Rows offer Edit and delete actions.
Define control ratings
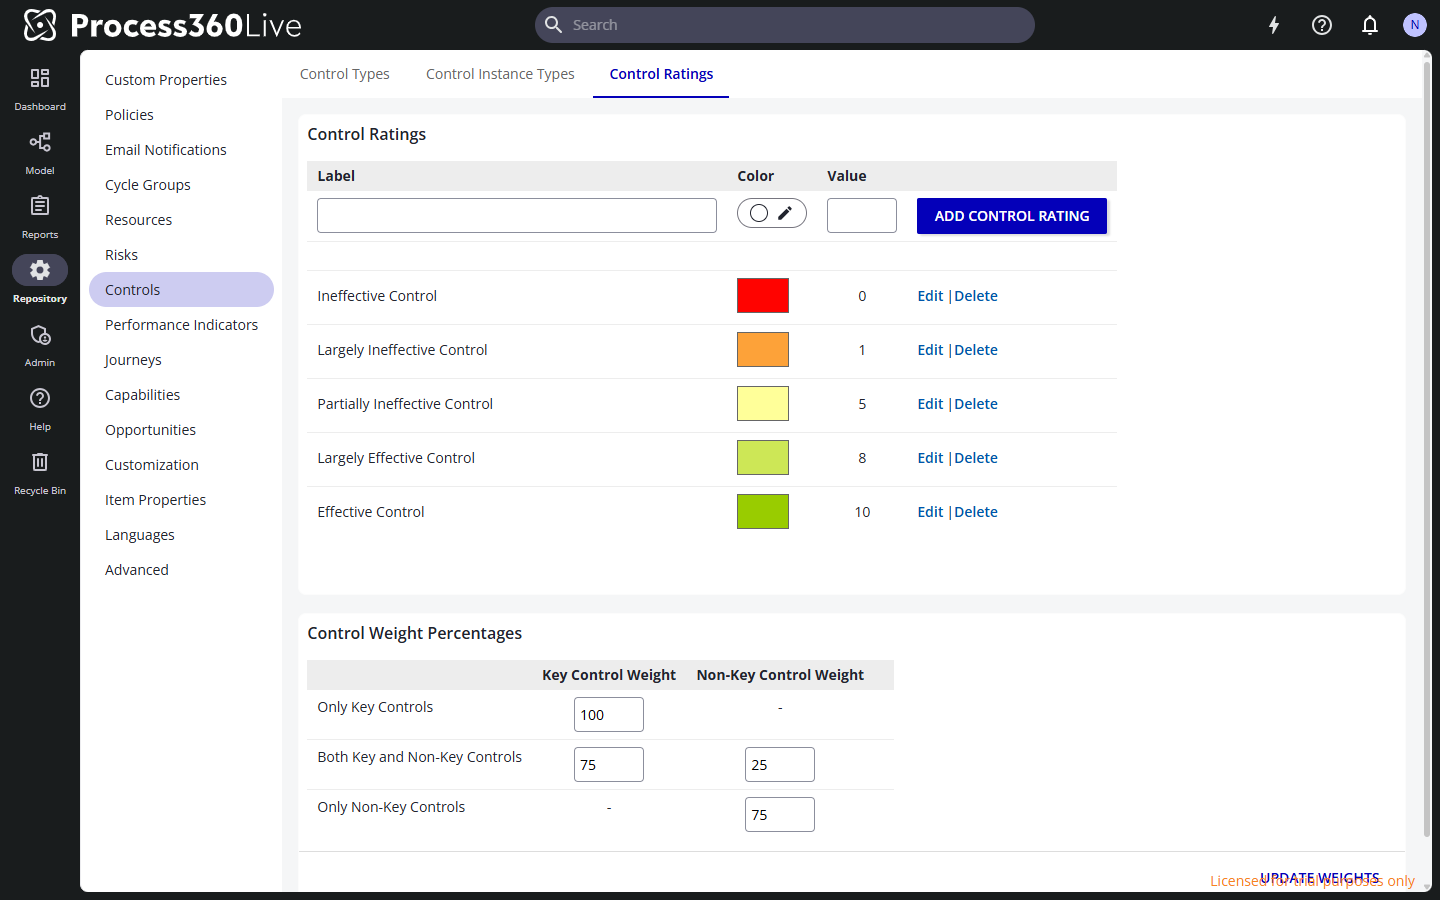
Control ratings are the effectiveness scale users rate controls with, and the rating values feed the residual risk calculation.
- On the Control Ratings tab, click Add Control Rating.
- Enter a Label (for example "Largely Effective Control"), pick a Color, and enter a numeric Value.
- Save the row. Use Edit and Delete on existing rows — deleting a rating leaves controls that used it without a rating, and cannot be undone.
Set the key/non-key weighting
Controls are marked key or non-key on the control itself. The Control Weight Percentages table decides how much weight each kind carries in the residual risk calculation, depending on what mix of controls a risk has:
| Scenario | Key Control Weight | Non-Key Control Weight |
|---|---|---|
| Only Key Controls | 100% by default | — |
| Both Key and Non-Key Controls | 75% by default | 25% by default |
| Only Non-Key Controls | — | 75% by default |
Change the percentages and click Update Weights.
Categories on controls
The categories shown on Controls and Control Instances are the shared risk categories — maintain them on the Risks page; see Configure risks.
Download an assessment report
The Assessment Report tab downloads the control assessments of the repository as a spreadsheet. It requires the PRC (Performance, Risk and Control) Module — see the License capability matrix — and appears only with the Control Assessment Tab Early Access feature enabled, the same toggle that enables recording assessments.
- On the Assessment Report tab, narrow the report with the filters: Years, Assessors, and one filter per assessment question — Yes, No, or Either. Leave a filter empty to include everything.
- Click Download XLSX.
The spreadsheet holds one row per assessment, with the Validation Date, Assessor / Saved by, and Control columns, the answer to each of the five questions (Existing/Complete, Appropriate, Effective, Documented, Optimizable), and a comment column per question. The report respects permissions: controls you can't access are left out, and where you may only see your own assessments, only those are included.