Manage users and groups
User Management is where accounts come from: create users, organize them into groups, and manage the directories they live in.
Prerequisites
- The Manage Users and Groups server permission. View Users and Groups is enough to look without changing anything; the Directories tab additionally needs Manage User Directories, and Password Policies needs Manage Password Policies.
Steps
Create a user
- Open the Admin area and select User Management. The Users tab lists every account, with a search box and an alphabet bar to jump around.
- Click Create user in local directory, and enter the email, name, and password. Two checkboxes finish the account: Force change password on login and Send invitation email.
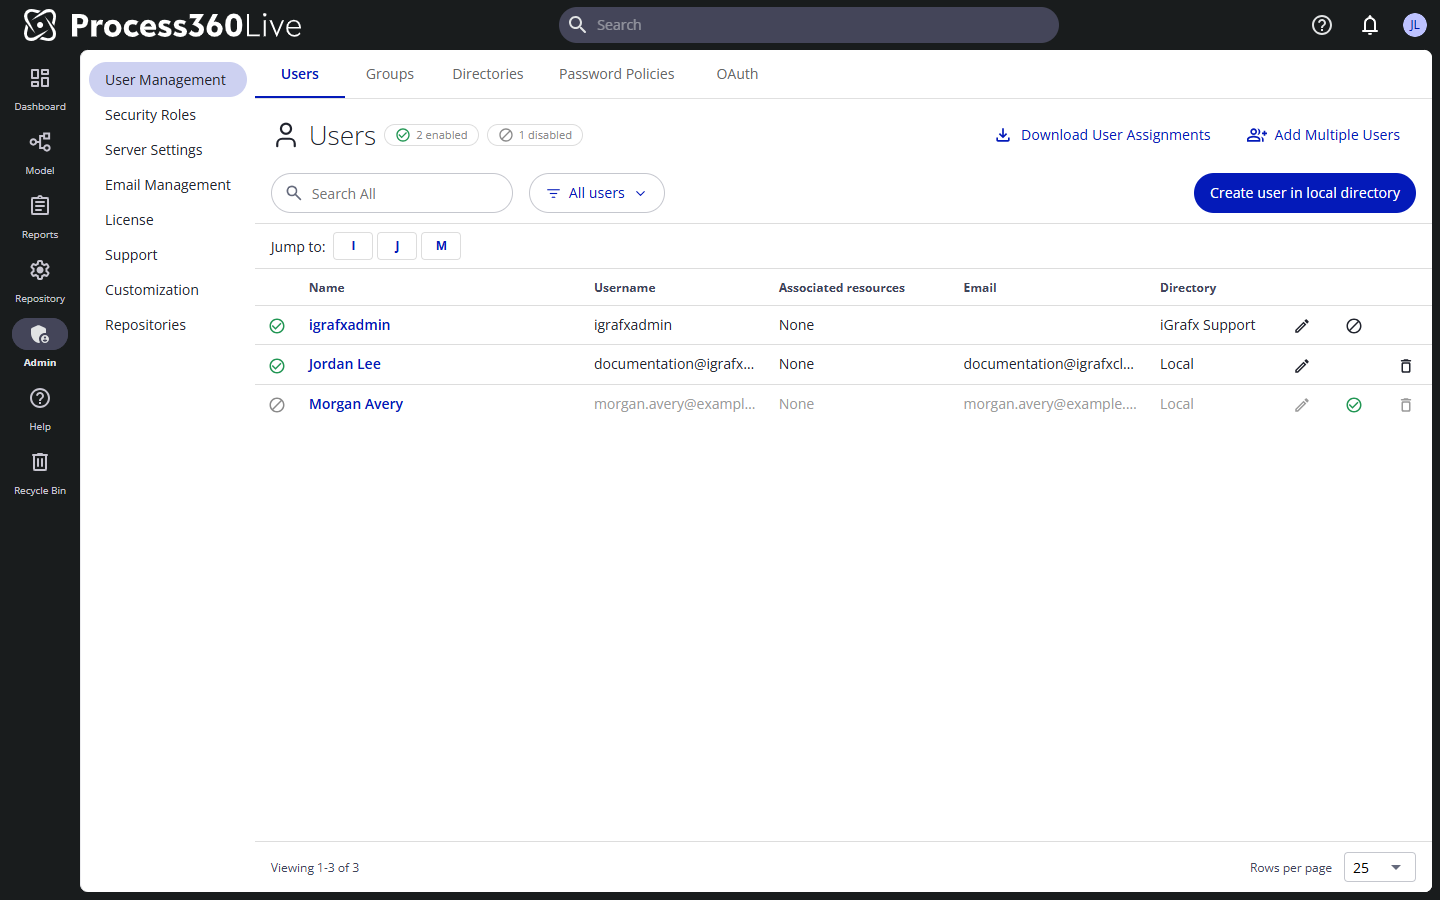
The list has its own menu, at the top right of the Users list above the Create user in local directory button: a vertical three-dot icon with the tooltip Users List Menu. It offers Download User Assignments for an export of the user list — including each user's first name, last name, and email address alongside their groups, licenses, last login, directory, and status.
On cloud instances that sign in with iGrafx IdentityiGrafx Identity The iGrafx identity and access management service that brokers authentication between customer identity providers and Process360 Live components., the same menu also offers Add Multiple Users, to add many accounts at once — one user per line: email address, optionally followed by first name and last name, separated by commas. The accounts are created as a background job you can follow in the Status Log.
Users from a connected directory (LDAP or SCIM) can't be created or edited here — they're managed in your identity system and synchronized in; see Synchronizing your user base.
Edit, disable, or delete a user
Beside the list heading, counts show how many accounts are enabled and how many are disabled, and a filter above the list narrows it to Enabled or Disabled accounts.
- Click Edit next to the user. User Details holds the editable fields and shows the user's Directory — the identity source the account belongs to (Local, or a connected LDAP or SCIM directory), or Deleted in directory if the account was removed from its remote directory but kept locally. Below it the page shows the user's Server Roles, Repository Roles, and License Assignment (each marked with the group it's inherited from), their Linked Resources, and API Keys, where Generate API Key creates a key for the REST API.
- Disable blocks sign-in but keeps the account and everything attached to it; Enable reverses it. Users removed from a connected external directory stay in the list as disabled.
- Deleting removes the account permanently. You can't delete your own account or a repository owner.
Organize groups
On the Groups tab, create groups and add users — or other groups — as members; nesting lets a department group contain its team groups. Groups are the unit you attach roles, licenses, and cycle group membership to — see Use groups to manage permissions.
A group's chips count its member groups and users, and flag how many of those users are disabled.
The built-in Everybody group always contains every user, can't be deleted, and can't be nested.
Review directories
The Directories tab lists where accounts come from — the local directory plus any connected LDAP or SCIM directories, with their user and group counts. Add new directory connects a new source; the provisioning guides cover the setup per identity provider.