Connect the iGrafx platform to the database
In a new installation, opening the platform URL (for example http://localhost:8080) forwards you to an Installation page where you finish setup in the browser. It has two sections: General Settings and Database Settings.
Prerequisites
- The platform deployed and running.
- The database, user, and password created and ready.
Steps
General settings

- Set the Administrator Username and Administrator Password — the initial user who can sign in after setup. You can keep this user or delete it later, for example once you've connected Active Directory and have real administrative users.
- Set the Site URL to the DNS name you want for the application. Use a valid, reachable URL — if unsure, keep the default (the hostname and port you opened the site with, such as
http://localhost:8080). You can change it later in the Administration area. An invalid URL can cause problems: you may lose access to the application, platform emails may carry the wrong URL, and the REST API documentation may be unreachable.
Database settings
Provide the details for connecting to the database. The fields depend on the Database Type; the common, recommended setup is Microsoft SQL Server over JDBC.
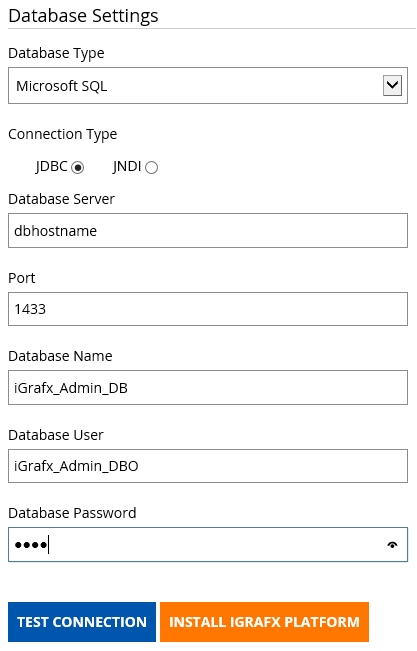
- In Database Name, enter the database from the Create the databases step.
- In Database User and Database Password, enter the user from the Create the database user step.
- Fill in the remaining fields, then click Test Connection to confirm they're correct.
- Click Install iGrafx Platform. When it finishes, the login screen appears — sign in with the administrator account you created.
Related
- Create a repository in the new database.
- Manage users and groups.
- Assign licenses on the License Management page.